

Guide for Efficient 6-Boss Catacombs Clears in New World
So I play with a mix of groups. Some players have sorted Catacomb builds that work really well together and are basically examples of the emerging/established meta. We normally clear 5-6 bosses and with a good map can finish 6 bosses with 2-3min spare. Others play off-meta builds and we struggle to clear 4 bosses. I am supportive of anyone playing any build but it is good to be realistic about what is achievable when taking outright DPS and group synergy into account.
Clearing all 6 bosses efficiently requires planning for group composition, gear optimization, and movement builds for rotations. Below is a practical approach that works towards the emerging meta for exploratory and clear phases. Healers are kind of in a bad spot. I’ve don’t think I’ve cleared more than 5 bosses with a healer, but it’s possible I guess. Likely they’d need to play a tank role for a 6-boss clear. A tank is not needed (until 5th or 6th boss).
I’ve not seen any posts that brings together builds, group composition and strategy, so I thought I’d write it up. Below are my notes to help guide the remaining groups of players create the emerging meta gearsets. Having a group of 5-6+ players you can rely on to run catas makes the game really fun. I dictated to Copilot for notes and then went back through them, edited, and added more detail.
Catacombs is such a fun mode with a good balance of time spent for reward that encourages you to experiment with builds and all kinds of things. I’ve played hatchet, spear, GS, rapier and BB builds, and heavy tank, and below are my recommendations and strategy. It is painful to think how such a mode could’ve helped with retention if it had been released earlier
Contents
Exploratory Phase Strategy
Before committing to boss clears, you’ll need to locate all six bosses (or five if that is the goal).
Stay within 200m of your group whenever possible to share soul shards and avoid unnecessary wipes. Look for looped/parallel runs of rooms that enable you to clear alongside.
Aim to get at least 11 ascensions during this phase. Solo first boss, 12 ascensions. 5th boss to get 13. Getting 13-14 ascensions before clearing bosses should make bosses 4-6 relatively straightforward. I’ve not cleared 6 bosses with less than 13 ascensions for 6th boss.
The Hatchet build shines here
Slightly less DPS than Blunderbuss, but far greater survivability thanks to Leeching from Enraged Ring and Hatchet’s Berserk.
I run two Elementally Charged pieces, Winged Leather Shoes, and good RNG pieces for the rest.
With a Runeglass Jasper in Hatchet, you can facetank almost everything – even solo Ascension rooms are manageable.
An equivalent spear build is possible, with keen speed on spear. But I don’t think even spear can match hatchet survivability.
Some maps are just bad. Either too far to run to clear all six in a timely fashion or no way to stay within 200m. Just aim for 5 bosses and stress less.
Boss Strategy
Designate who kills which boss early to avoid confusion during rotations.
Bosses 1–3: Start with three burst DPS builds. Assign one DPS per boss for fast clears. The first three happen at same time, finished in less than a minute. The time delays will be for bosses that have phases (Neesh, fire, etc) and other bosses just get straight up deleted (SSB, Angry Earth, etc).
If you have someone off-meta then duo one boss in first boss clear (so first round, one solo DPS and one duo) and the third boss in second round, as the solo boss clear DPS runs from where ever they are to get ready to do group 4th boss).
Boss 4: Continue with three DPS burst. Should be straightforward, just play mechanics. Be aware of AOE attacks.
Bosses 5–6: Switch to Heavy Tank + 2 Burst DPS. Boss 5 can sometimes be done with 3 DPS, but Boss 6 almost always needs (or goes much smoother with) a tank. I have cleared 6 boss a few times with 3 DPS but pretty rare, depends on the boss (SSB, Neesh, Angry Earth brute have been done).
You actually have more time than you think. We normally start clearing bosses at 16-18 minutes remaining. Depending on how much running we have to do, we normally are doing boss 5 at around 8 minutes, and boss six at around 5 minutes left.
I pop ward pot and coating for all boss fights.
Movement & Haste
After the exploratory phase, switch to haste builds for faster rotations between bosses, then switch back to DPS build for fights:
Grace Bow is the best option for perma-haste (bow passive + Grace synergy).
Hatchet is poor for haste because Berserk requires hits to maintain.
Inferno Fire Staff is a strong offhand for mobility if you only have one build.
Recommended DPS Builds
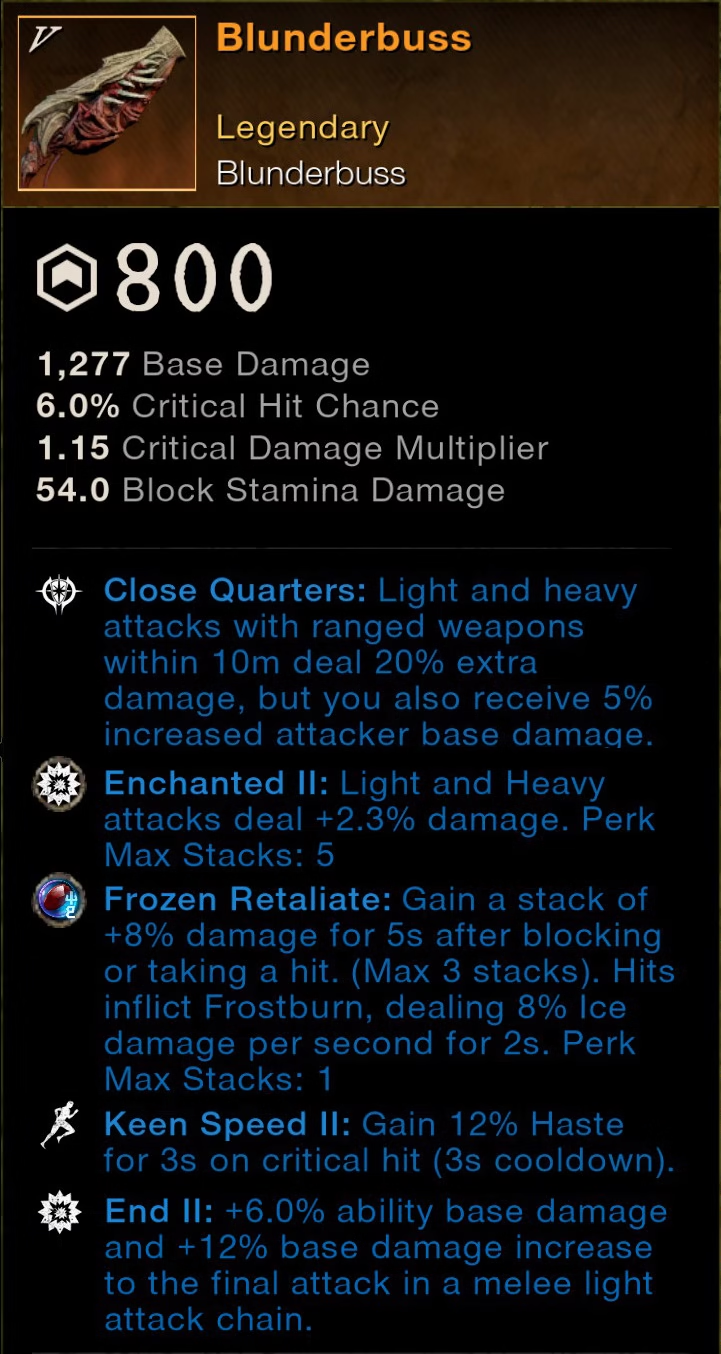
Blunderbuss Burst Build
Two major approaches for BB builds; high refreshing (spam abilities, particularly empower from claw shot into shrapnel blast) or low refreshing (basically shrapnel blast, and moonstone in gem slot).
Chest: Grave Vessel Breastplate (Elementally Charged Set)
Weapon: 3. Grave Offering Blunderbuss with keen speed, or 2. Close Quarters BB, or 1. (BIS) Keen speed CQ BB
Jewelry & Armor:
Barrow Robber’s Earring (Overcharged Set)
Tomb Raider’s Helm or shoes (Overcharged Set)
Tomb Raider’s Gloves (Overcharged Set)
Ring: Enrage ring with enchanted totality
Pants: RNG or Overcharged piece with Sacrificial Empowerment (or elementally charged if CQ BB).
Amulet: RNG chest run, maximise protections and/or skill perks.
Boots: Winged Leather Shoes (if Keen Speed synergy)
Headpiece alternative: Old Crown or other viable options are possibly Attuned Leather Pants or Nimble Coat
Slot setup: 5x Enchanted Ward, 1x Keenly Fortified, rest Enchanted.
Stat Allocation:
~350 STR / 150 INT / 50 CON
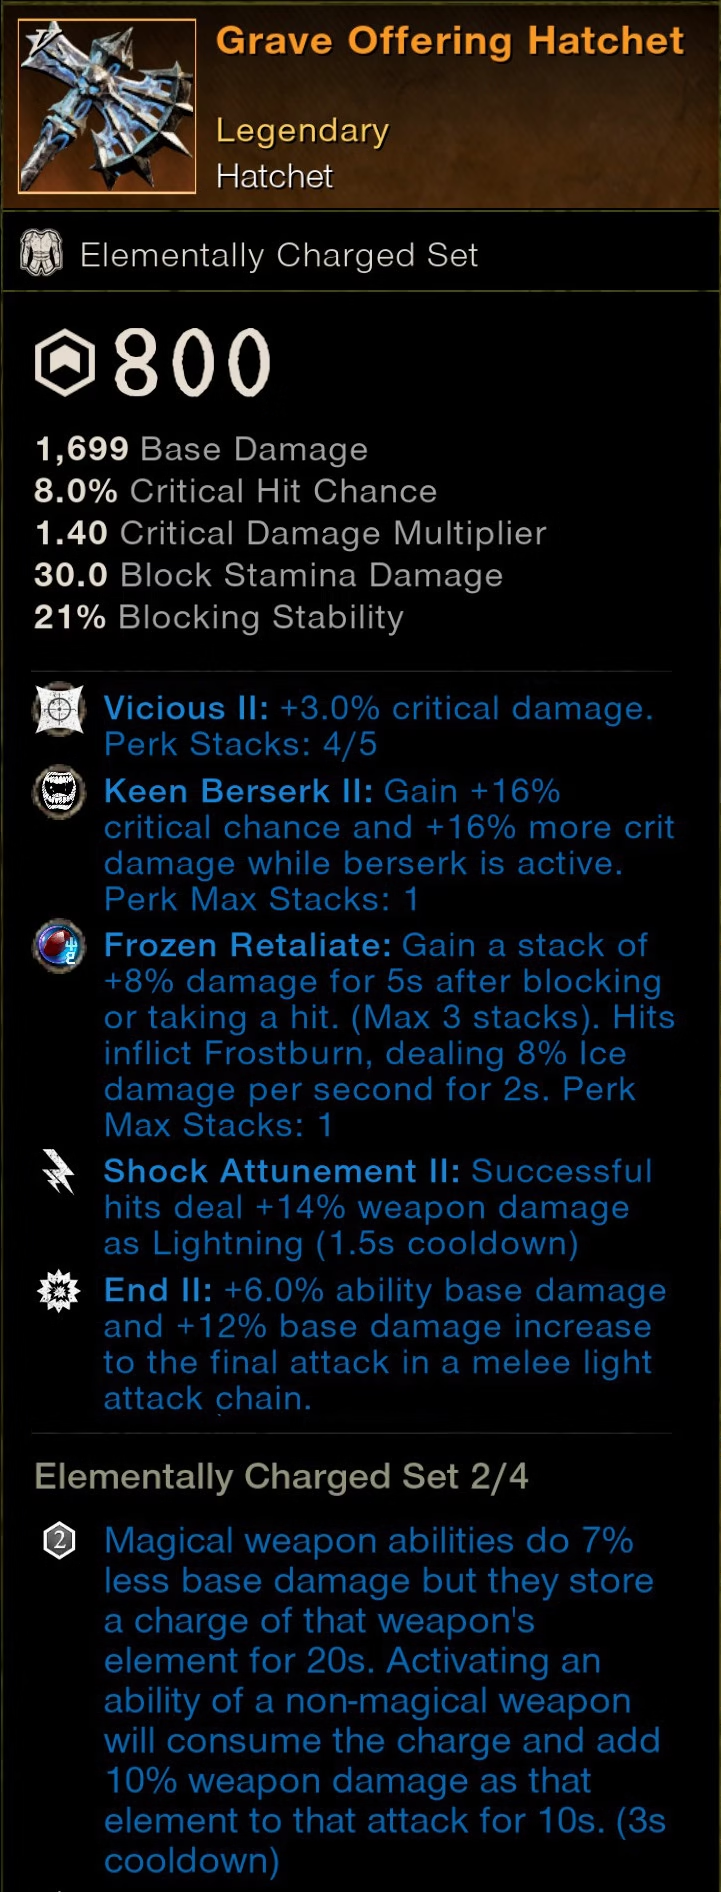
Hatchet Burst Build
Weapon: Grave Offering Hatchet (Elementally Charged Set)
BiS perk: End II
Slot setup: Keen Berserk + Vicious
Passive skills synergy in berserk and torrent for haste with shoes.
Armor: Same as Blunderbuss build with elementally charged and overcharged mix. I’ve replaced overcharged pieces with RNG.
Boots: Winged Leather Boots for damage/haste
Offhand: Inferno Fire Staff for damage/mobility
Stat Allocation:
~350 STR / 150 DEX / 50 CON

You could run no con or the +6 from Old Crown in BB build, depending on ascensions, but I’ve found popping a con food works best. The no con approach actually works well with the hatchet due to the berserk
Heavy Tank Setup
Artifact: The Unmoved or Void Darkplate
Weapons:
Primary: Greatsword (I have an End II, Hated, Trenchant Rend, Gem, Defensive slot, near BIS; BIS would be defensive slot was trenchant strike or even an offensive slot for enfeebling)
Secondary: Sword & Shield (with Trenchant Rend), there are other combos but I’ve found this GS/SNS works best.
Armor perks: Gem slot + Defensive (+Defensive) + Prolonged Favor on every piece
Offensive slots: I run enfeebling (ie such as in The Unmoved)
GS tanking with The Unmoved is the nicest tanking experience I’ve had in the game.
Prioritise Enchanted Ward + Grit Ward for each piece with dual defensive slots where possible. If you have more and/or running this set in raids or expeditions then also slot some healing defensives.
I have had to switch to armor with skill slots for relentless freedom and calamity as my previous setup had skills on weapon.
RNG Amulet and earring; I am trying to get element protection plus one or two physical protections (strike and slash) for expeditions. I have a three element protection and gemslot for gorilla.
350con, rest in str
Gear Priority Checklist
Inferno Fire Staff for mobility
2× Elementally Charged pieces (Chest + Weapon)
3× Overcharged pieces (Earring, Headpiece, Gloves; Pants RNG)
1x Enraged ring
Winged Leather Shoes for haste
Sacrificial Empowerment on everything where possible
Amulet from chest drops
Alternatives to Inferno
Deep freeze – for damage boost, need frozen runeglass for mainhand weapon, still procs elementally charged damage boost, entomb good defensive ability if needed
Aconite – for damage boost, need nature/poison runeglass for mainhand weapon, does not proc elementally charged damage boost
Non-set gear
Yes, you can assemble non-set gear that is potentially better than the above. But this will require RNG rolls and lots of currency. The most effective way to do this is to get 5+ boss clears and then roll for non-set gear from the catacombs vendor. You will get ~3500+ sterlings for 5 bosses, which is 35 chests. 5500+ sterlings for 6 bosses.
Slots
-
Sacrificial empowerment (or prolonged favor for tank set)
-
Gem slot
-
Defensive slot (or offensive if DPS and you believe in yourself lol)
-
Offensive slot (or defensive for double defensive tank set)
Then another random fixed perk, which depends on what piece. If Winged Leather Boots and elementally charged chest (basically must have, ele charged chest can be replaced with BIS infix chest run piece if it drops), then for DPS sacrificial empowerment on everything, one Lifestealer’s Draught (if tank set then Prolonged Favor and LSD) and/or:
-
Head – Quick Revive
-
Hands – Empowering Breaker (DPS) or Breaker Bypass (Tank)
-
Legs – Terminal Vengeance or Shirking energy (light build)
Another way to do is Reekwater runs and purchase the mutation gear from the Soulforge vendor. This is not as efficient imo as the Catacombs vendor as you can’t control for what gear slot and you can do potentially 20-35-50+ chests in 60 minutes (4-5-6 boss clear) for targeted pieces, compared to 21-22 chests per hour for Reekwater.