
Hone your skills on the Angry Earth this week in preparation for them Rising Up in Season 3. Or take a chill stroll through Isabella’s home town, the choice is yours. Just, whatever you do, don’t buy umbrals from shard sellers – we don’t know what’s going to happen to them but you could just be wasting your gold.
Note: Elemental damage gems in your weapons are simply recommendations based on the elements your enemies are weakest to. Your playstyle may suit non-elemental gems better and you are encouraged to continue using those if so.

Expedition specific
- Corrupted Ward armour
- Corrupted Bane weapon
- Sapphire gem Arcane damage
- Corrupted Ward potion
- Corrupted Coating
- Thrust damage – Spear, Rapier, Bow
General buffs
- Honing Stone
- Attribute bonus food
- Topaz gypsum attunement potion
Mutation specific
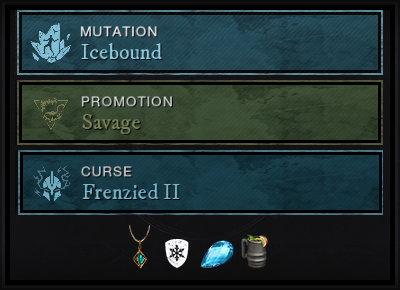
- Frozen protection amulet
- Aquamarine in armour
- Desert sunrise
Tempest’s Heart is the longest expedition, with a generous hour allowed to complete it. Thrust weapons really penetrate through Corruption, so you’ll be likely to carry at least one. Spears not only have that damage bonus but also provide some strong debuffs like Perforate and if you have Enfeebling Skewer you can seriously reduce the damage to your team. Rapier offers fast damage with the bonus of constant bleeds and you can use Leeching Flurry to quickly regain your own health while robbing the enemy of theirs. If you prefer to stay out of reach, the Bow provides ranged damage and added DOT damage.
Isabella taunts us throughout this dungeon, finally remaining to finish the fight at the end. Remember to use your Azoth Staff on her once she falls, or she’ll rise up and you’ll have to repeat the fight. Before you make it to the final battle, you have to go through the fires of Neishatun. He will burrow into the ground three times, leaving you to navigate a series overlapping firey pools. If you’re standing in one when it pulses, you’ll take a stack of DoT damage that cannot be cleansed until the fight it over.
Ice, Ice, Baby! Everything slows down in the cold and this mutation is no exception. At M1 level we start with Icebound, which means all enemies are dealing Ice Damage, so pull out your Aquamarines and Frozen Protection amulet. Most annoying is Shiver, a zone of exclusion that bites anyone who is outside of it, which keeps the group huddled up together. Be careful of enemies with Glacial, as they will drop a crystal that can root you in place. To prevent this, you need to destroy or run away from the crystal, depending on where it is positioned.
When you get to M3, Festering enemies start to appear, dealing disease against you so your incoming healing will be reduced. Remember, debuffs can be Purified in a number of ways. Slicer enemies also turn up, adding 30% base Void damage, so think about diversifying your protective gems in this mutation.
The real trouble starts when things get Frenzied. At M6, players begin being penalised for dodging, by acquiring a stack of Unstable that does 1.5% of max health as Ice damage per second for 10 seconds and cannot be cleansed. You can get up to three of these stacks. When we get to M9, 3 stacks of Unstable drops a 3m radius zone that does 10% of max health per second for 15 seconds – ouch, that’s 150% of your health if you just stand there! If you enter this zone with stacks of Unstable, it will consume them and do 30% of max HP. So, it’s really important to manage your stacks and move away from the group if you can’t avoid dropping a puddle. Don’t poop on the group.

Expedition specific
- Angry Earth Ward armour
- Angry Earth Bane weapon
- Angry Earth Ward potion
- Angry Earth Coating
- Slash/Fire damage – Hatchet, Axe, Great/Sword
General buffs
- Honing Stone
- Attribute bonus food
- Topaz gypsum attunement potion
Mutation specific
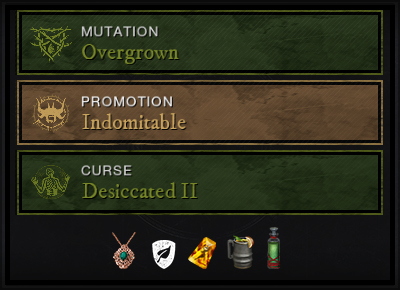
- Nature protection amulet
- Amber in armour
- Desert sunrise
- Nature Absorption potion
The Garden of Genesis is one of the classic expeditions, having been in the game since release and very popular as a place to raise your item expertise. It’s the only Angry Earth dungeon and can be run pretty fast, although there are a couple of sticky spots that can slow groups down. The worst of these is Alluvium Marl, the Caretaker, who guards his Greenhouse in the middle of the dungeon. He can be seen terrifying those facing him. Our advice for this boss is to just kill him, and do it fast.
Overgrown means those mobs are going to be healing one another, which really should be a privilege exclusive to us. Compost mobs drop a healing circle that works like a Sacred Ground for them and looks a bit like one too. This is one of the rare times that disease perks are useful in PVE, so pull out your Hatchet with Infected Throw, or slot a weapon with Plagued Strikes or Plagued Crits. Your Bile Bomb heartrune will also spread disease around, so vomit away to your heart’s content.
Toxic mobs spawn THE most annoyingly friendly little green blob that follows you around, does pretty intense DOTs (20-40%), and casts an area root. We just love not being able to move and getting damaged at the same time. Best bet is to try and stay out of its way. If you get stuck, it might be worth it to have Nature Absorption potions slotted and chug one down. Arboreal enemies are dealing 50% of damage as Nature, and Bramble enemies deal 20-40% base damage as Nature when hit, so Amber slotted in your gear will protect you.
When we get to M3, some of the mini-bosses gain Phalanx shields that block projectiles, which is particularly annoying for healers who are trying to speed up their cooldowns or charge up their heals with heavy attacks. If you play ranged DPS, make sure you have a melee weapon in your other slot and be aware that heals might be a bit less powerful. Vampiric also makes an appearance, which can make enemies slower to kill, so your Bile Bomb heartrune might be useful.
The Curse of the Overgrown Garden is Desiccated, which is your basic dip and nae-nae. When a player gets a Nature ring around them, they need to dip all team members in order to remove their Shrivel. But make sure they nae-nae away before the timer ends to avoid spiking others with a chain Nature for 50% of their max health. If you’re unlucky enough to be left shriveled, damage and healing will be reduced by 50% until the debuff wears off.