Hive of Gorgons
The Heroes Charge in Yet Again!
The Hive of Gorgons is New World’s first linear raid. It’s more like an expedition than what we have come to expect from Trials. Adventurers enter a beautifully crafted ruin and venture deep within to find the Hive of Broodmother Medusa. There are three main boss fights, each with loot rewards, plus a reward for clearing the raid at the end. In between, there are smaller fights and puzzles to solve, making this the most in-depth New World experience. Expect to spend around an hour in here if you want to clear it (with the exception of world-record speed runners).
You can only receive the loot rewards once per week, and there is no incidental loot from the trash mobs, although if you’re fast you can pick up some resources on the way. The weekly rewards are excellent though, with 725 gear dropping, as well as resources to craft your own perfect items. This is content that you want to be able to complete, so we’ve provided a guide to help you get there.
Contents
Before you join a Raid group, you should make sure you’ve done everything you can to be prepared. This will be the difference between a tortured 3 hours failing to beat the bosses, and a successful run. The things you need to consider are your gear and weapons, plus making sure you have all the buffs you need.
If you can’t afford consumables, please don’t just remain quiet and hope no-one notices. Most people would prefer to give you some of theirs than have you run without any. Depending how long the run takes, you may need to rebuff partway through, so remember to bring extra.
Trophies
Make sure you have three houses with an Angry Earth combat trophy in each and that your house tax is paid. Even if you can’t afford Major Trophies, just put up the highest level you can get.
Onyx are recommended as your base gems in your armour. You can switch this out to Ambers for the Broodmother for optimal protection against all her Nature attacks, although you should be able to get away with just swapping amulets instead if you want to save on gems.
A Nature Protection amulet will help against the nature damage throughout the raid. You should swap this to Strike Protection for the Echidna fight, and then swap back afterwards. An easy Strike Protection amulet to get is the Sporelight Amulet from Elysian Wilds. Nature is a bit trickier and you may need to upgrade a Lifering Amulet, Azoth Battery or Azoth Crystal amulet to get one with Magnify
Most Hive raids run a fairly traditional set of roles, with one Tank, two Healers, and seven Damage dealers. It works best if some of the Damage are able to apply Rend and Weaken. However, there is room for flexibility in this Raid, unlike the Sandwurm, so feel free to experiment with different builds.
The Tank’s role is to stay alive and hold agro, so as usual there is a balance between having enough health and protection, as well as being able to do some damage to maintain the mobs’ attention on you. The Tank is the leader of the raid and should be confident in their choices, so play this your way, as long as it works. Maximising your amour rating is helpful here, so if you have Void Darkplate, you should use it.
Armor
- Heavy Armor
- Void Darkplate
Resistances
There are usually 2 healers, one whose job it is to heal the tank, and then an AOE healer to keep everyone else alive and provide utility support. The main healer should have at least one single-target heal, such as Divine Embrace, and be in the group with the tank. They may also have Essence Rupture on their Void Gauntlet, to add healing for everyone who is hitting the bosses. Alternatively, they could run the Power stone flail on their off-hand.
The second healer uses their AOE abilities to add healing circles for the clump, then swaps to Void Blade to maintain Oblivion for the buffs/debuffs. They can either have Scream, to lock the Corvids in place, or Essence Rupture, which they can cast more quickly due to the Void Blade reducing cooldowns.
If you’re planning to heal the Hive of Gorgons, you should be an experienced healer with a lifestaff that has Blessed, Refreshing Move, and the weapon ability perk of your choice on it.
Armor
- Light Armor
- Attuned Leather Pants, Featherweight, Grey Wizard’s Hat, or Nimble Coat
- Sacred on Ring
- 4-5 Enchanted Ward
- 4 Refreshing
- Weapon ability perks – Fortifying Sacred Ground, Refreshing Divine Embrace.
It’s important to keep up a fairly high level of damage throughout the raid. This means DPS should be in Light armor and have low Con. It is recommended that you run with 50 Con or below. If this feels low to you, try 52 Con and carry Roasted Rabbit with Seasoned Vegetables which you can eat to bump your Con up to 100 if needed.
There are two kinds of damage roles needed – Pure Damage and Utility support.
Pure Damage
For beginners, this will often be Rapier paired with something else, either a magic weapon or a dex weapon. A nice safe build is Rapier Firestaff or Rapier Bow. You can use the firestaff or bow during the Echidna fight and during the trash mob phases if you like. It’s important you use the rapier in the Typhon fight, for maximum damage output.
Many players will run a Bleed build for their rapier due to the synergy with the Finisher artifact. While this is a high damage output, the more bleed rapiers there are in a group, the less damage overall, since they share the Finish bleed consume. Therefore, it is safer to use an Evade build,* which also does very high damage as long as you have the Omnidirectional Evade perk. You can still use Finisher, just put the perk on your armour.
In the Medusa fight, a Greatsword build is useful for high damage against the Eggs. You can pair this with a ranged weapon like throwing hatchet or bow, for shooting flowers, adds, and the boss.
* Variations on this build may use Riposte. I prefer the mobility of Fleche.
Utility support
The role of utility support is incredibly important and will often be the difference between a successful and unsuccessful run. Using Rend and Empower to increase everyone’s damage more than makes up for not doing the absolute maximum damage yourself. Weaken and Fortify adds to group survivability. This role can afford a bit more Con, because their personal damage is less important than being alive to keep damage up for everyone.
War Hammer can maintain Rend with three different abilities, while Spear provides both Rend and Weaken. Either can be paired with a throwing hatchet for the versatility of range plus an extra rend and weaken. Sin extends the duration of debuffs from both weapons by 20%. Trenchant Rend can also be added to any melee weapon (16% 7s, heavy melee attacks), most often Sword Shield. Having a SnS DPS can give Leadership to the second group.
The mobs in the Hive have 50% Rend resistance and 66% Weaken resistance, which basically means it’s much harder to hit the cap and you should apply as much rend and weaken as possible.
- War Hammer – Armor Breaker’s Lasting Trauma (30% 10s), Sundering Clearout (11% on armour – 24% on weapon 7s), Sundering Shockwave (11% on armour – 15% on weapon 10s)
- Spear – Perforate (15% 10s – 5% per stack, max 3 stacks), Perforate’s Rupturing Strikes upgrade
- (30% 10s – 10% per stack, max 3 stacks)
- Sundering Javelin (22% on armour – 41% on weapon 10s target above 50% health)
- Hatchet – Rending Throw (20% 10s – 14s Targeted Impact upgrade if target is more than 6m away )
- Void Gauntlet – Disintegrate from Void Blade or Orb of Decay (10-30% 8s – 10% per stack, max 3 stacks)
- Greatsword – Skyward Slash (10-30% 10s – 10% per stack, max 3 stacks)
- Sword Shield – Achille’s Heel (15% 2s), Whirling Blade’s Opportunity in light equip load (15% 10s)
- Blunderbuss – Blast Shot Preparation upgrade (10% for 6s)
- Musket – Traps Trapped Damage upgrade (20% 3s trap triggered)
- Bow – Rending Headshot (10% 5s headshot)
- Rapier – Sundering Riposte (16-25% 10s)
- Spear – Perforate Impactful Strikes (10% 5s), Enfeebling Skewer (28 on armour – 48% on weapon 8s)
- Hatchet – Infected Throw (10% 10s -15s Mortal Power upgrade if target is below 50% health)
- Void Gauntlet – Withering Oblivion (15% 5s – 5% per hit, max 3 stacks), Baleful Tether (20% 10s – duration of tether)
- Flail – Arcane Eruption (10-30% 6s), Spiky Impairment (10-30% 6s), Cured Flailment (10-30% 6s), Warding Bludgeon Stable Impairment (10-30% 6s), Heavy Burden (20% 5s Power Stone only)
- Musket – Shell Shock (10% 4s headshot)
- Bow – Enfeebling Poison Shot (17% on armour – 28% on weapon 6s)
- Great Axe – Enfeebling Maelstrom (17% on armour – 28% on weapon 6s)
- War Hammer – Shockwave’s Frailty (10% 10s)
- Void Gauntlet – Oblivion (15%)
- Flail – Arcane Vortex (10% 5s)
- Sword Shield – Leadership (10% group members)
- Life Staff – Fortifying Sacred Ground (11-17% 5s)
- War Hammer – Clear Out’s Power Cleaner (20% 6s 6m radius)
- Sword Shield – Defensive Formation (30% while blocking, allies within 4m) – note Leadership is generally more beneficial to the team.
Armor
- Light Armor
- Attuned Leather Pants or artifact of choice
- Damage add Ring, e.g. Thrust Damage
- 4-5 Enchanted Ward
- 4 Refreshing
- Weapon ability perks, e.g. Omnidirectional Evade, Leeching Flurry, any appropriate utility perks from the lists above.
The first puzzle you will encounter is the one to open the door to the Echidna arena. Once the mobs are cleared, two players need to stand on the two plates. This will spawn spiders, so it’s best to do it one at a time. The tank should grab the agro of the spiders and hold them, alive.
While a player is standing on the plate, a series of balls will start rotating around pillars on the opposite wall. When a ball turns yellow, it can be hit to turn it green. Yellow balls appear alternately on each side, so if one plate is inactive, the balls will not keep going yellow on the other side. Once all 4 balls on each side are green, the door will open.
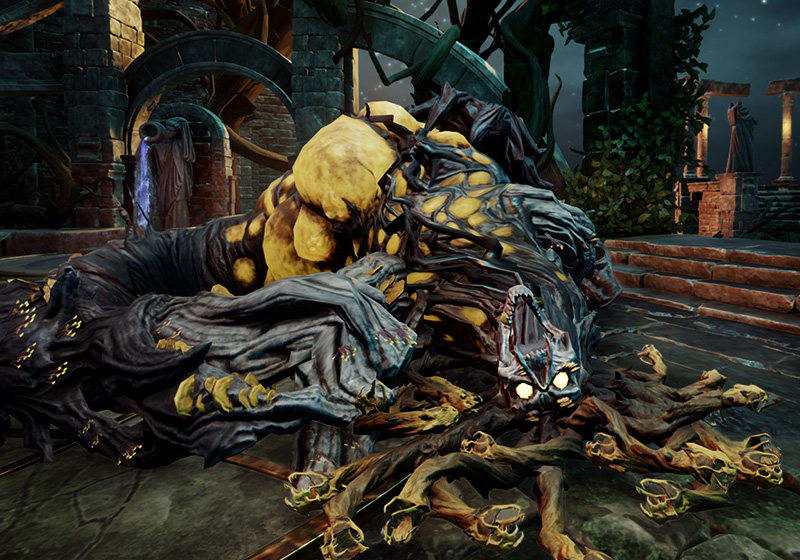
The first boss is Echidna. This fight can be a lot of fun, once you know what’s going on. It is a lot easier to play it with a ranged weapon and engage with the pillar mechanics, although some groups will choose to melee for speed. Be warned, it’s only faster that way if you don’t die!
Before you enter the room, change into your Strike amulet. Make sure your buffs are still active.
Once you run in, the tank will engage Echidna near the front entrance of the arena. Ranged DPS should position themselves near the back and sides, the main healer will need to be close enough to reach the tank with heals. The off-healer needs to be flexible and help DPS heal themselves. DPS should be using potions.
Echidna will start with a Tremor Shockwave that damages everyone standing on the floor, then the first Pillars will emerge. Look for a patch of floor with a pile of gravel surrounded by a circle of symbols and stand on it. This will bump you up into the air as a pillar rises from the ground. The pillar does strike damage, so if you are low health you can find yourself dead on top of one. Being off the ground stops you taking damage from the shockwave, rock projectiles, or vines that emerge from the crystals. If you don’t make it onto a pillar, you can mine an unoccupied one down to jumping height. Pillars are three levels high, so if they are placed well, you can mine nearby pillars to 1 and 2 levels high and use them to jump on a 3 level one. Being on the highest level pillar empowers you to do more stamina damage, so ranged DPS should be doing heavy attacks.
When Echidna’s stamina is broken, try to hit the tallest spine on its back for extra damage.
Periodically, Echidna will shoot out its spines and spread Crystals around the arena. If a crystal hits a pillar, it will glow white and explode. This is instant death, so check your pillar and jump off if it’s glowing. In the early phases, just clear the crystal/s near the tank. However, when Echidna’s health starts approaching 50%, it is important to clear all remaining crystals from the arena. Any crystals that remain when Echidna screams will detonate and do arena-wide damage. The devs mention that having 3 up will result in a group wipe, but even 1 does a significant amount of damage. Hatchet’s Defy Death can save you here, but it’s best not to let it come to that.
Once we reach 50% health, Echidna starts a new rotation of moves:
- Scream – Echidna will pound the ground and drop close pillars down one level, then step toward the middle of the arena and stand up on its hind legs to scream. This causes an arena-wide detonation of pillars and crystals. If you’re on a pillar, jump off. You can continue attacking Echidna during the scream.
- Crystals – Next, echidna will shoot out crystals. The first time this happens, you need to ignore crystals and focus on dodging the jump. Every other time, DPS should focus on clearing these crystals before returning to damage Echidna.
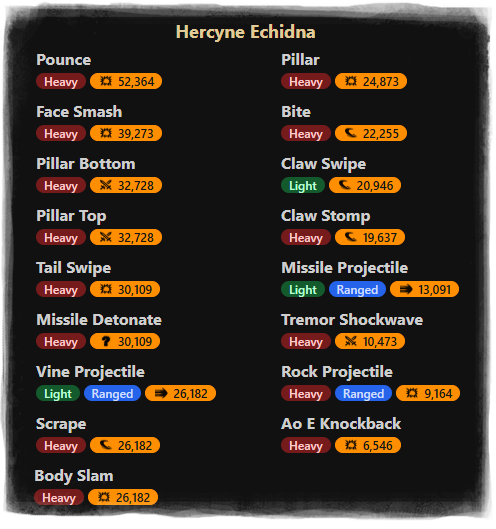
- Jumping – after the first scream, Echidna will pounce four times. This does an AOE damage, not just on the person it’s aimed at. Find a clear space away from crystals, and dodge when Echidna is at the top of the jumping arc (not when it lands).
After the jump phase is finished, clear crystals. New pillars will emerge, so try to get onto one. Echidna will now cycle back to the scream, jump off towers, clear crystals, dodge rock projectiles, new pillars, repeat. It is important to clear all crystals each time, starting with the one closest to the tank. Echidna will also jump to one player and back to the tank. A symbol appears above your head to let you know. Remember to dodge, even if it means falling off your tower – it’s going to get broken anyway.
Once Echidna is dead, you’ll get your first loot bag, consisting of a Gorgon’s Eye, one piece of 725 Hoplite jewellery, and 1-2 pieces of 700-725 Gorgon’s jewellery.
To progress through the Maze, the team will need to activate three sets of two plates. Each set of plates is guarded by two Spiders. Additionally, there are the two lovely ladies roaming the Maze, ready to obliterate you with their gaze.
We send two players in to grab the attention of the bitches. Their job is to kite around the central area of the maze. Once they have the agro, the tank leads the group through to each set of plates, killing the spiders and leaving two players behind to activate the plates. Once all six plates are activated, the door opens and everyone can run through to the other side.
The next big fight is Typhon. This is where many groups get caught up and cannot progress. It is really important for DPS to all work together to kill the adds, with only the tank remaining on the boss during that phase. Damage is also important here, so if you are playing rapier/ranged, make sure you are on your rapier for most of this fight. You also want some utility – Oblivion and Leadership for empowers, spear or hammer for Rends. Void Gauntlet Scream and the Brutal Heartrune of Grasping Vines help lock the corvids in place, but be aware they can conflict so don’t overlap them.
Many of Typhon’s attacks are Slash damage, so it is recommended that the tank put on a Slash amulet and/or Shield here. There are also some Thrust and Strike attacks, so Onyx in our armour is still good. For DPS and healers, the main threats are the Thorns, which are Nature damage, so you should be wearing your Nature protection amulet.
This fight has three stages, and at the end of each stage Typhon will open a new room. It is important to head toward the end of the arena and be ready to enter the next phase. You can tell when the phase change is coming by looking at Typhon’s health bar:
- Stage 1 – 100-70% health
- Stage 2 – 70-30% health
- Stage 3 – 30-0% health
This fight is mostly about doing damage to the boss, clearing the adds as fast as possible and avoiding traps.
- Spikes – periodically, 3 players will get a red symbol above their head and a red circle at their feet. While this is active, it will spike AOE Thorns in the circle, three times. Anyone inside the circle will take damage. The player who has the spikes can avoid the damage simply by moving. So if you get the red symbol, move out away from the fight and run around the edge of the arena until the spikes wear off.
- Thorn Maidens – Typhon will send out creeping vines of Grasping Thorns that catch anyone in their path. While you are trapped, you will receive tick damage. Unlike other traps in the game, you can break yourself out of these thorns by attacking. However, healers, tanks and rendbots may not be able to do enough damage to get out fast enough, so please free your friends when they are trapped.
- Dead Zones – each room is broken into three zones, with the pillars marking the edge of each. If a zone goes red, it is going to have thorns appear on the ground that will kill you. Move away from the red zone until the thorns are gone.
- Adds – Typhon will spawn a small army of enemies, including spiders, corvids, and wolves. If we fail to kill the corvid/s, Typhon gets an empower buff. If we fail to kill the wolves, he gets a regen buff. It is important to target and kill the Corvids first. If you have aggro from Wolves or Spiders, bring it to the Corvid. The Corvid will always try to move back to do its ranged attacks, so use crowd control to lock it in place or just keep following it. If any mobs remain after this phase is over, there will be a health drain on everyone, so make sure you stand in a heal or drink a potion.
- Eyes – after the adds phase, Typhon will move to the centre of the room and one player will get a symbol that looks like dark eyes appear above their head. This player has a few seconds to position so there is a pillar between them and Typhon, who will freeze them then charge in their direction. If the pillar is in the way, it will smash and stop the charge. If the player is too close to the pillar, the smash will kill them but they can be revived. If Typhon hits them, they are out. During this phase, everyone else should be doing damage.
- Slam – Stage 2 and 3 only. Typhon will do an AOE Ground Slam that ripples out away from him. This can be dodged but the timing varies based on how close you are to him.
In Stage 1, there are 4 pillars. No Slam.
In Stage 2, there are 3 pillars. The Adds phase can include 2 Corvids.
In Stage 3, there are only 2 pillars. Spikes will be applied to 4 players instead of 3. There will be 2 Corvids each adds phase.
As you can see, it becomes quite important to kill Typhon quickly, before you run out of pillars. Whenever DPS are not dealing with other mechanics, they should be doing as much damage as possible to the boss. It’s not okay to sit back on your bow in this fight – you need to use your higher-damage melee weapon. However, range may be appropriate if you need to stay close to a pillar as the Eyes phase approaches, or if mobs are in a Dead Zone.
You’ll get another Gorgon’s Eye when the fight is complete, plus one piece of 725 Hoplite armour and 1-2 pieces of 700-725 Gorgon’s armour (loot biased). If you happen to be dead and out toward the end of the fight, take off any pieces you don’t want to drop (for example, your Attuned Leather Pants).
After Typhon, you continue through the Hive. It’s darker now and you will encounter medusa heads on the side of the path, that can freeze and damage you if you get caught in their gaze. Either observe their timing or slip around behind them. Finally, you will come to a fountain and a room with a barrier line, so make sure everyone is on the bridge before moving in.
This room is covered in stinky growth, that causes damage over time. The stink can be cleansed by water from the fountains. There are six fountains inside and one outside, and four of the inside fountains are locked behind overgrowth. Throwing water from a fountain will cleanse the overgrowth. The fountains are on a timer, and you can only draw from each one twice during its active cycle. To make this fight easier, it is possible to throw water from the back fountain outside and start cleansing the room and locked fountains. One or two dedicated water throwers should do this and everyone else lay down or step to the side so as not to block their view.
Once the group enters the room, the tank will try to gather up the mobs and it’s important to place fountain water cleanses around for people to use, as well as clearing any remaining stinky growth from the room. An elephant will spawn to the left, which DPS should target first to get rid of it quickly. Once the first round of mobs are dead, another round will spawn. Once those are dead and the entire room is cleansed, two platforms will appear at the end of the room. When three people stand on a platform, it opens a door.
The raid needs to split into two groups, with one taking each path. There are levers along the way that unlock the other group’s path. When the two paths reunite, it’s time for the final fight.
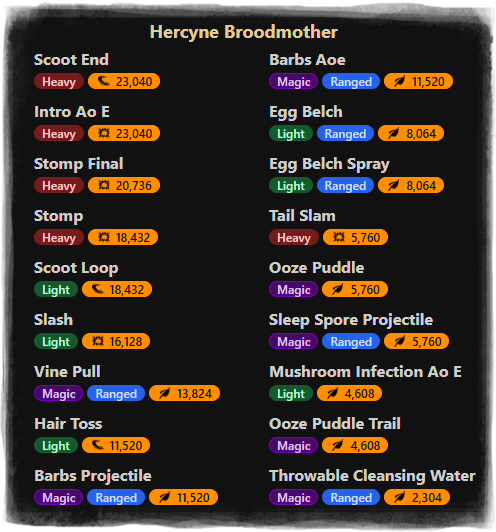
The final boss is Broodmother Medusa. Her arena has four fountains, just like the ones in the Stinky Room. These need to be used strategically, and we usually have two dedicated fountain users at the end near the tank (flexible), and leave the other two fountains for emergency and self-cleansing.
While the Broodmother herself does various physical damage attacks, the majority of the area damage in this room is Nature. Make sure you have your Nature Protection amulet on and consider adding some more Ambers if you feel you need them. The area around Medusa is pretty stinky so ranged DPS is safer in here.
- Eggs – every so often the Broodmother will belch out up to three eggs. They slowly regen health and if they get to full, a mob will spawn. These are weak to Slash and Strike damage, so it’s good to dedicate 2-3 Great Sword or Sword players to getting rid of them.
- Mob Spawn – sometimes an egg will spawn as a mob, or the team won’t get to one fast enough. When this happens, DPS should all attack the mob to clear it quickly.
- Charge – if Medusa is hit by the cleansing water, she will charge randomly across the arena, leaving a trail of slime behind her. This makes cleansing the tank tricky, so drop the cleansing pools just behind the tank and allow them to step back into it.
- Bloom on the back – Broodmother Medusa will spawn a bloom on her back, which needs to be killed. Musket’s penetration can do this even when she is facing the wrong way.
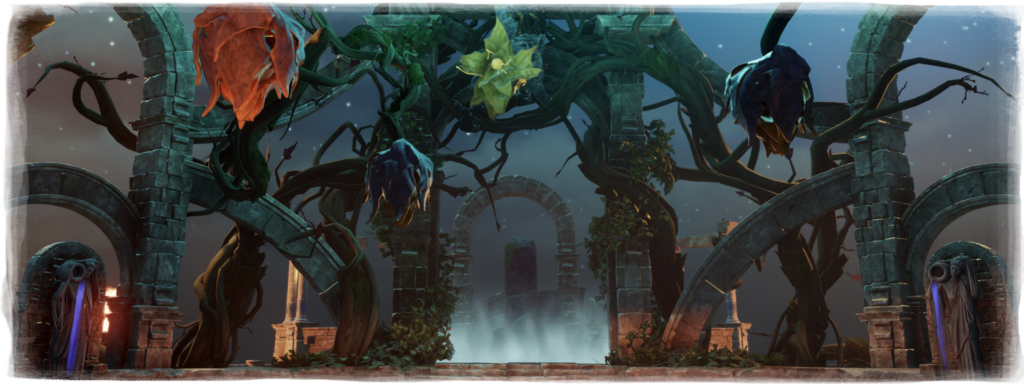
- Vicious Bloom – ceiling flowers. There are three flowers that open on the ceiling and drop fog. These need to be cleared quickly by ranged DPS.
- Sleepy Fog – white fog will drift around the room. Avoid it as much as possible, as it will send you to sleep if you stay in it too long. When aiming up, keep checking your position to make sure fog isn’t creeping in. If someone falls asleep, they can be woken up by having water thrown on them.
- Vines – when Medusa gets to 40% health, the fountains will be locked behind vines. Everyone who is free should attack the vines to clear up the fountains.
The most important thing in this fight is to keep all the mechanics under control. When a group gets sloppy with the eggs or cleansing the floor or clearing the flowers, the room becomes too full of hazards and difficult to manage. Positioning is also important here, try not to stand in the stinky or sleepy stuff to reduce the need for cleansing.
When Broodmother Medusa dies you’ll get her loot, which includes a Gorgon’s Eye, 725 Hoplite weapon and 1-2 700-725 Gorgon’s weapons (loot biased). If you want to get a different weapon than ones you are using, organise with the group to die during the last 10%, and quickly change into the weapon/s you want to drop. If you only want one weapon type, leave your other slot empty.
This is the end of the Raid, so you will also receive 3 Chromatic Seals, a Gorgonite Inductor, 10 Hive of Gorgons Tokens, another Gorgon’s Eye, and a chance at a Gorgonite Schematic.
Good Luck
Some of you may look at this guide and think it’s far too conservative compared to the speed run videos you’ve watched. This is true. However, if you haven’t managed to clear the raid or can’t do it consistently, it’s worth learning the careful way and working with the mechanics, rather than thinking you can damage smash your way past them. Odds are, that unless your group is fully optimised, you can’t.
Using this guide, any group should be able to clear the raid and enjoy their sweet weekly rewards. Good luck!




1 Comment
[…] Hive of Gorgons – 10 player Elite Trial […]