
This week's mutation is organically Overgrown.
It’s all happening this week, with the new Siege of Sulfur event running and an exciting sneak peek into the new Outpost Rush map over the weekend, however it’s worth making time for mutations as well. This is the first time Empyrean Forge has been mutated since Season 7 was launched, so we’ll get our first look at the new Rapier artifact. It’s always nice to see a couple of jewelry artifacts up for grabs from the other two expeditions, and we have some mild synergy with Nature and Savage Divide.
Contents
Mutation

- Arboreal – 50% of all enemy damage is Nature.
- Bramble – Attacks cause damage on hit – M1: 20% Nature damage, M2 & M3: 40% Nature damage.
- Compost – Enemies with this title drop a healing circle on death, healing enemies for 3% per second.
- Toxic – Enemies with this title drop a poison spawn that deals Nature damage over time and seeks out the furthest player to cast root on them. M1: 20% Nature DoT, M2 & M3: 40% Nature DoT.
Promotion

- Vampiric – Enemies heal a percentage of damage done. M1: 20%, M2 & M3: 40%.
- Phalanx – Enemies cast a shield that blocks ranged attacks.
Curse

- Weary – Periodically applies Weary to players, slowing movement by 30% and increasing incoming damage by 20%. Can be delayed by using abilities.
- Blood Offering – Using abilities applies a stack of Offering, 4.5% max health Nature damage over time, up to a max of 3 stacks. While under the effect of Offering, the player has 25% life steal.
Consumables
- Nature Protection Amulet
- Ambers in Armor/Jewelry
- Desert Sunrise
- Nature Absorption Potion
- Powerful Honing Stone
- Attribute bonus food
Gearing up
- M1 – Opals in your armor is fine
- M2 – Add the Nature Protection Amulet
- M3 – Swap most of your Opals for Ambers
- Enchanted Ward – Aim for 4 or 5 pieces with this perk
- For more detailed advice on gear, check out our Gear Guide.
Get out of the Compost
If a Compost mob drops while you are still fighting, the tank should reposition to get the mobs out of the compost healing circle. You can also use the Bile Bomb Heartrune, Plagued Strikes, or other disease to reduce the effectiveness of the healing.
Don't get caught
Toxic poison spawn will chase down the furthest player, so if you’re outside the clump playing range, keep moving. You can easily outmanoeuvre the little fella but watch out if you get caught as it’ll hold you down and DoT you to death. Perks like Relentless Freedom, Berserking Purge, or the 300 Dex milestone perk can help you escape if you get stuck.
M2 - Melee and chunder
There’s a penalty for using ranged attacks once again, with Phalanx enemies putting up a deflecting shield, so make sure you have at least one melee weapon. Vampiric slows down the time to kill on mobs that have it, so slotting your Bile Bomb Heartrune can help.
M3 - To Ability or not to Ability
While Weary is (apparently) delayed by using abilities, they trigger Blood Offering. As long as you are doing damage, the life leech from Blood Offering should be enough to offset the Dot (if your Con is not too high, since it’s a percentage of max health). This curse is particularly challenging when swapping protection for a boss fight, since it still applies mutation type damage. If you’re hurting too much, consider sticking to basic light and heavy attacks rather than abilities.
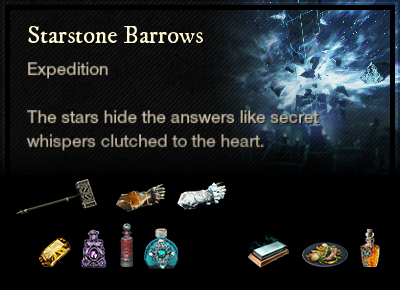
Starstone Barrows
Enemy Type: Ancient and Lost
Weaknesses: Ancient: 30% Lightning 20% Strike 15% Void. Lost: 30% Nature 15% Ice 10% Strike
Consumables
- Topaz gem Lightning damage* | Amber gem Nature damage*
- Ancient Ward potion | Lost Ward potion – 10% damage absorption
- Ancient Coating | Lost Coating – 15% bonus damage
- Ancients Combat Trophy | Lost Combat Trophy – 3/4/5% bonus damage x3
- Strike damage – Hammer, Void damage – Void Gauntlet | Nature/Strike/Ice damage – Life Staff, War Hammer, Flail, Ice Gauntlet
Note: *Elemental damage gems in your weapons are simply recommendations based on the elements your enemies are weakest to. Your playstyle may suit non-elemental gems better and you are encouraged to continue using those if so.
Artifact: Blooddrinker Ring
Dropped by Greundgul the Regent.

- +32 Magnify (selectable attribute)
- Ghoul’s Harmony: -25% damage, +25% lifesteal. All healing from lifesteal is increased by 5%.
- Empty Socket: Attach a gem to add its effect.
- Leeching: Heal for 7.1% of the damage you deal (Does not trigger off persistent damage or DoT effects).
- Hearty: +10% max Stamina.
Strategy and tips
While it has the same name, this is not the Starstone Barrows you entered on your journey growing up in Aeternum so many levels ago. There is a break in the walls of the dungeon and you’ll find yourself in Amrine, fighting Lost, for a period of time. This is a fun dungeon full of nostalgia, twists and tricks. Be careful of the purple beams as they will kill you outright should you wander into one.
When you emerge from the Lost tunnels and return to fighting Ancients, the first reliquary can be used to let the group through both sets of beams to continue fighting, while the torchbearer goes up the stairs to turn the power off. This saves everyone from standing around just waiting.
Remember to carry extra consumables so you can swap wards and coatings in higher level mutations, it can mean the difference between life and death.
Main Damage Type: Strike
Simon Grey has grown up too and is level 70 in mutated expeditions. His attacks are scaled up accordingly and his Overhead Slam can outright kill a low con, under-geared DPS. Apart from that, this is a fairly straightforward fight.
- Overhead Slam: Simon raises both hands over his head and slams down, causing AoE Strike damage. Look for the movement and be ready to dodge.
- Minions: Simon will spawn 3 lost enemies. If you don’t kill them in time, he will suck them in for a life leech.
- Vomit: Simon’s vomit is pretty toxic and will cause a slow as well as reduce incoming healing.
Main Damage Type: Slash
Greundgul is an Ancient construct with a very large sword. Be careful of the backswing when fighting behind her. She’s quite mobile and will push the group around the arena. Make sure you have someone with a ranged attack to stop her when she gets to the jumping phase.
- Throw Bone: Greundgul throws a bone at the furthest player, that spawns skeletal minions. These are only a mild annoyance unless the fight takes long enough to create too many of them. This can be minimised by the group clumping close to the boss, so the bone and adds get destroyed by everyone’s attacks.
- Jumping Phase: After the first time Greundgul’s health reaches almost zero, she will reassemble herself in the centre of the arena and then leap at a random player, sending out a shockwave of damage with each jump. To control where she jumps, the group should all stack on one player. If you can hit her in the eye as she lands, she’ll stop jumping. The jumping phase repeats periodically until she finally dies.
Interesting Loot
- M3 – Simon Grey’s Set – Medium armour with Arcane Harnessing and Health, upgradeable.
- M3 – Stormbound weapon set for skins – split stat Con/Weapon scaling attribute, Keenly Jagged/Blessed, Weapon Ability Perk.
- Starstone Amulet – Health, Fortified Recovery + Random perk and attribute.
- Starstone Ring – Fire Damage, Refreshing + Random perk and attribute.
- Starstone Earring – Despised, Nimble + Random perk and attribute.
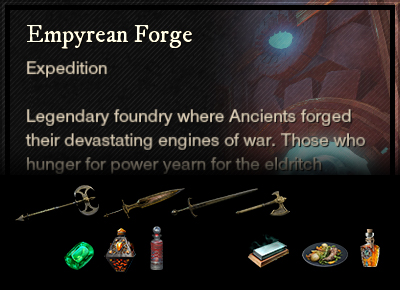
Empyrean Forge
Enemy Type: Human
Weaknesses: 15% Slash
Consumables
- Human Ward potion – 10% damage absorption
- Human Coating – 15% bonus damage
- Human Combat Trophy – 3/4/5% bonus damage x3
- Slash damage – Sword, Greatsword, Hatchet, Great Axe
Artifact: Dorgort's Blade Rapier
Dropped by Ifrit.
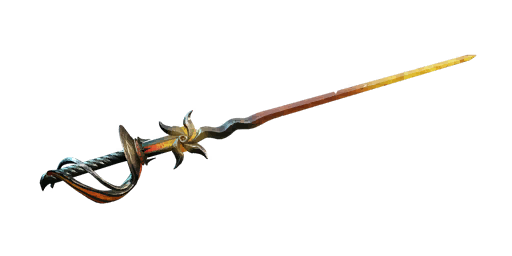
- +38 Magnify (selectable attribute)
- Lava Tip: Heavy melee attacks on both weapons cause 10% burning for 6s (Max 3 stacks).
- Empty Socket: Attach a gem to add its effect.
- Trenchant Strikes: Heavy melee attacks deal +23% damage.
- Refreshing Move: Light and Heavy attacks reduce your active weapon cooldowns by 2.5% (0.2s cooldown).
Artifact: Inferno Fire Staff
Dropped by Commander Marius.
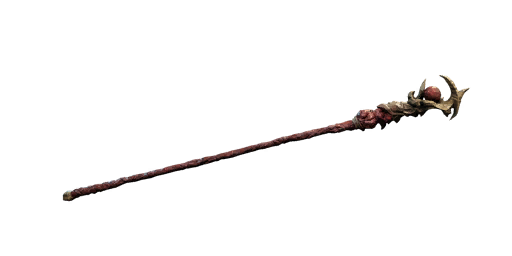
- +38 Magnify (selectable attribute)
- Inner Power: If your strength attribute is higher, replace your base weapon scaling with strength. +15% damage when you hit a target within 15m.
- Empty Socket: Attach a gem to add its effect.
- Keenly Empowered: Gain 10% Empower for 5s on critical hit (10s cooldown).
- Vicious: +7% critical damage.
- Cannot add Gem Setting Pin
Strategy and tips
The main thing you should know about the Empyrean Forge is that you need to have your music turned on. The soundtrack for this expedition is so perfectly tuned to the environment that it would be a crime to miss it. The Forge is also the first expedition to drop two artifacts, one from each boss.
As you might guess from the name, Empyrean Forge is full of Fire damage, so it might be worth slotting your extra resistances in Fire. As well as the human Varangians, there are a few Lost enemies, but not enough to justify changing up consumables. Common pitfalls include falling in lava and getting crushed by giant pistons, so watch your step.
There is a puzzle to solve in the first section of the expedition and near the end. If you only stand on the trigger plate once, the code will be the same for both versions of the puzzle. This means you can make the second puzzle room much easier. Take the upper path and preload the sequence except for the last turn. Then send someone down to stand on the plate, and do the final rotation. This will stop the ghost spawns and make the Blunderbuss Mini Boss fight much easier.
Main Damage Type: Fire
Ifrit was originally going to be Lost but was then changed to Human due to feedback from the player community. He has unique weaknesses – 30% Arcane and 20% Ice so a weapon with a Sapphire in it, or an Ice Gauntlet may be helpful here.
The first time you fight Ifrit the myriad fire attacks feel chaotic but once you get to know them, the mechanics of this fight are predictable and easy to manage. Ifrit does not move from the centre of the arena, except to bend forward and bop someone if they get aggro from a distance.
Positioning is important in this fight, and no-one should be at the far edges of the room, so they don’t get caught in the Flamethrower. The tank should stand to one side of Ifrit, allowing the party to see the SE wall so they know when Fire Discs are emerging.
- Fire Discs: multiple discs of fire shoot out from the SE end of the arena. You can dodge these or even lie down beneath them if you’re nimble.
- Fire Balls: a large yellow sigil will appear on the floor at your feet indicating the imminent arrival of a fireball from the sky so that you can move out of the way. The impact will leave a crater of lava that does fire damage if you stand in it.
- Slam: a cross of fire will appear on the floor beneath Ifrit, indicating that he is about to slam four ways. Just stand on the diagonal to avoid it.
- Flamethrower: Fire walk with me. Ifrit will extend 2 beams of flame that extend to the edges of the room, in front and behind and then rotate anti-clockwise. You need to follow the flamethrower’s rotation to avoid being hit by it. The further away from the centre you are, the faster you have to run, so it’s important to be closer to the middle of the arena. This will be repeated and then followed by a double flamethrower, with 4 beams extending in a cross. By this time, the floor will most likely be covered in lava pools. While you should avoid as much fire as you can, if you have the choice between the flamethrower and a lava pool, walk in lava.
Main Damage Type: Fire
This is another trial by fire and you should swap into a Flame Protection amulet before stepping into the arena. First of all, make sure you touch the respawn crystal just outside the door, as this fight can go south quite easily and you don’t want to have to do the long run of shame.
The arena is quite small and has three raised platforms, with short corridors extending from the main central space at the lower level. You will need to keep moving but remain aware of the different spaces and how you can use them to your advantage. The fight goes more smoothly if you have a tank who will maintain a position instead of chasing Marius around, but either way, everyone needs to keep on their toes during this fight.
- Bungie Boss: periodically, Marius will spin away from the tank toward a DPS and then spin back. This is a dance move and not loss of aggro, so there is no need to freak out. Just dodge, whether you are the target or not, as he will spit firey sparks during the spin that cause a Fire DoT.
- Execute: Marius will do a large melee smack down with his Greataxe. You can’t block this but you can just step to the side and avoid it. Melee DPS need to be careful of their positioning.
- Volcanos: (or Pimples, as we call them) – Eruptions of fire will emerge from the floor throughout the arena, particularly under the feet of players. Move to avoid a nasty Fire DoT.
- Floor is Lava: Marius will go to the centre of the room the first time this happens, and raise his flaming axe slowly into the air. The lower section of the floor will fill with lava, leaving only the three platforms as safe zones. With enough fire resistance, this is not too much of a problem.
- Magmaballs: At around 50% health, Marius will start dropping his large, hot balls. This will start on the SE platform (to the right of the entrance) and continue to each platform in an anti-clockwise rotation. A large fire ring will appear on the floor to show you a ball is about to drop, then it will roll to the opposite wall. Each corner of the short corridors, just outside the ball drop radius, is a safe zone where the balls cannot hit you. At about 25% health, 2 balls will drop at once, so be very careful about where you are standing.
Interesting Loot
- M3 – Fire Lord’s Set – Heavy armour with Fire Harnessing and Enchanted Ward, upgradeable.
- M3 – Molten weapon set for skins – split stat Con/Weapon scaling attribute, Desperate Empower/Savior, Weapon Ability Perk.
- Molten Amulet – Health, Alacrity + Random perk and attribute.
- Molten Ring – Sacred, Refreshing + Random perk and attribute.
- Molten Earring – Refreshing Toast, Purifying Toast + Random perk and attribute.
Savage Divide
Enemy Type: Beast
Weaknesses: 20% Thrust
Consumables
- Beast Ward potion – 10% damage absorption
- Beast Coating – 15% bonus damage
- Wildlife Combat Trophy – 3/4/5% bonus damage x3
- Thrust damage – Spear, Rapier, Bow, Musket, Blunderbuss
Artifact: Endless Thirst Earring
Dropped by Mahantaram.

- +32 Magnify (selectable attribute)
- The Thirst: Healing consumables are 33% stronger, but Survival and Mana Potion cooldowns are 25% longer.
- Empty Socket: Attach a gem to add its effect.
- Empowering Toast: On Potion Drink: Gain 10% Empower for 8s (10s cooldown).
- Fortifying Toast: On Potion Drink: Gain 20% Fortify for 8s (10s cooldown).
Strategy and tips
Even after running it a few times, it’s still easy to get lost in the Savage Divide. The pathways look very similar and there are repeated mechanics throughout. To open doors, someone will need to pick up a ball and place it on the pedestal beside the door. If they get hit, the ball will usually reset. Fun fact about Savage Divide, it has two gypsum nodes that yield a gypsum orb each – keep your eyes out for them!
As well as the standard Thrust damage weakness that Beasts have, elemental enemies in the Savage Divide are weak to their opposing element. So Ice Mammoths and Ice Hurlers have a 15% Fire weakness, Nature beasts have a 15% Lightning weakness and Lightning beasts have a 15% Nature weakness. Plants, such as the Razor Lotus, are Angry Earth rather than Beast.
Main Damage Type: Elemental
Both boss fights in Savage Divide employ all the elements, to keep you on your toes. Kurok is a large gorilla, with no weaknesses. His arena has four shrines, for the elements Fire, Ice, Lightning and Nature. When he leaps to a shrine, he will activate it, and an AoE attack of that element will periodically spawn at the shrine and move around the room. After the element has been up for a short time, the shrine becomes active and a player can interact with it to become an antidote for that damage type. They will have a small elemental disc at their feet and when they stand on the AoE attack zone, it neutralises it.
After a player has activated the antidote, Kurok will move to a different elemental shrine and start that one, requiring another player to get the antidote disc and clean up any AoE damage zones. Groups will often hold off activating the antidote to minimise the amount of different elements spawning, especially if the first shrine is Nature. While an element is not being neutralised, Kurok will build stacks of that element. At 10 stacks, he does an AoE attack, which you can dodge if you’re watching. For the last 10% of his health, he does Void damage and builds Void stacks. This is the most dangerous part of the fight and someone often goes down.
If you see a red target appear above your head during the fight, Kurok is about to throw something at you, so be ready to dodge.
Main Damage Type: Elemental
Mahantaram is a mammoth who spawns various elemental conduits while he tramples all who dare enter his cave. Like Kurok, he has no weaknesses and commands all elements. It is important that the DPS destroy the conduits as quickly as possible before returning to damage the boss. The tank can maintain aggro and move Mahantaram around the room to keep out of elemental damage zones.
If you see a red target appear above your head during the fight, Mahantaram is about to charge at you, so be ready to dodge.
Interesting Loot
- M3 – Primal weapon set for skins – split stat Con/Weapon scaling attribute, Keenly Empowered/Blessed, Weapon Ability Perk.
- Primal Amulet – Strength, Health, Empowered + Random perk.
- Primal Ring – Dexterity, Crippling, Hearty + Random perk.
- Primal Earring – Intelligence, Refreshing Toast, Healing Heart + Random perk.