This week's mutation is inescapably Icebound.
We have a couple of OG expeditions this week, and a splendidly synergistic Glacial Tarn with the Icebound mutation. Frenzied can be a bit of a pain if you’re braving the M3s but apart from that it’s a pretty chill (pun intended) set of dungeons this week.
Contents
Mutation

- Frozen – 50% of all enemy damage is Ice.
- Rime – Attacks cause a slow on hit – M1: Heavy and Special attacks, M2 & M3: All attacks.
- Glacial – Enemies with this title drop an ice crystal that slows and roots players.
- Shiver – Enemies with this title inflict Biting Cold on players who are not near them
Promotion

- Festering – Enemies apply a stacking Disease on being hit. M2: 2.5% reduced healing per stack, M3: 5% reduced healing per stack.
- Slicer – Enemies cast slicing beams that do 30% Void damage.
Curse

- Unstable – After dodging, players receive a stack of Ice damage over time dealing 1.5% max health every second for 10 seconds.
- Overcharged – If Unstable expires with 3 active stacks, it drops a 3m zone that lasts 15 seconds and applies 10% max health Ice damage per second. Entering the zone will consume all stacks of Unstable and deal 30% max HP damage.
Consumables
- Frozen Protection Amulet
- Aquamarines in Armor/Jewelry
- Desert Sunrise
- Honing Stone
- Attribute Bonus Food
Gearing up
- M1 – Opals in your armor is fine
- M2 – Add the Frozen Protection Amulet
- M3 – Swap most of your Opals for Aquamarines
- Enchanted Ward – Aim for 4 or 5 pieces with this perk
- For more detailed advice on gear, check out our Gear Guide.
Avoid Ice Crystals
Glacial enemies will drop an ice crystal on death, that can root you in place. You have a couple of seconds to move out of the crystal’s radius before it snares you, so be aware of the glacial tag and ready to move. The crystals can be destroyed, but this takes extra time. Perks like Relentless Freedom, Berserking Purge, or the 300 Dex milestone perk can help get you out of a tight spot.
Huddle up in the cold
Shiver enemies will hurt anyone outside their frosty radius, so working as a close melee group works best with these. If your group is having trouble with enemy AOE damage or the backswing on their attacks, the healer can place a Sacred Ground for ranged players to stand in.
Combat slows with speed
To make up for the slows applied by Rime, you can use speedy perks to get the group running faster. Speed of Light, the final Beacon upgrade, is one option, or the Quick Shower upgrade on Ice Gauntlet’s Ice Shower gives a short speed boost. You can also apply your own personal hastes if you are using a weapon that has them.
M2 - Void and Disease
We all know Slicers are annoying, even more so when you’re fully gemmed up for a different type of elemental damage. Between these and the Festering disease, your healer might need a little help keeping you alive, so make sure you bring plenty of health potions.
M3 - Don't Poop on the Group
While fully geared and optimised groups can power through multiple Overcharged pools of pain, civilised dodgers might prefer to drop their load in a corner away from others. The other option is to use your dodges carefully and never allow the full three stacks to build up.
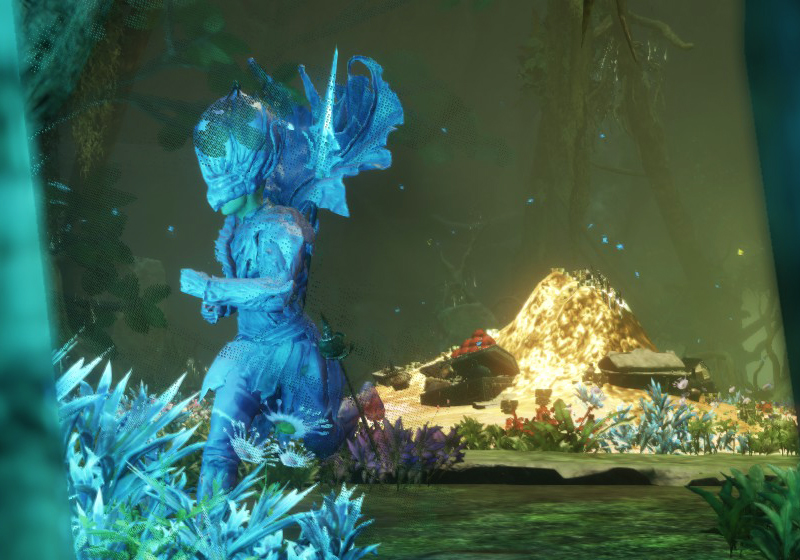
Garden of Genesis
Enemy Type: Angry Earth
Weaknesses: 30% Fire 20% Slash
Consumables
- Angry Earth Ward potion – 10% damage absorption
- Angry Earth Coating – 15% bonus damage
- Angry Earth Combat Trophy – 3/4/5% bonus damage x3
- Slash/Fire damage – Hatchet, Axe, Great/Sword, Fire Staff
- Ruby gem in weapon for Fire damage*
Note: *Elemental damage gems in your weapons are simply recommendations based on the elements your enemies are weakest to. Your playstyle may suit non-elemental gems better and you are encouraged to continue using those if so.
Artifact: Freya's Francisca Hatchet
Dropped by The Blighted Greenskeeper.
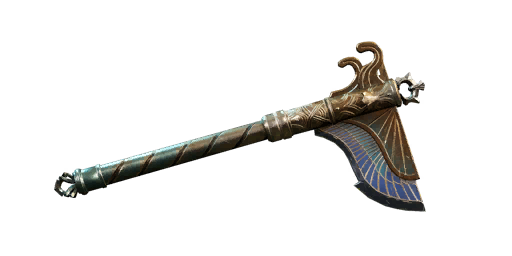
- +38 Magnify (selectable attribute)
- Thrown Mastery: Thrown Axe projectiles reduce all axe skill cooldowns by 25% (5s cooldown).
- Empty Socket: Attach a gem to add its effect.
- Empowering Rending Throw: Ranged Hatchet attacks deal +40% damage against Rending Throw targets.
- Refreshing Move: Light and Heavy attacks reduce your active weapon cooldowns by 2.5% (0.2s cooldown).
Strategy and tips
This Garden is full of snares and Blight, so this is one time you might choose to use Powerful Incense over Desert Sunrise. Genesis is the shortest expedition and lots of players are used to speed-running it, so expect to have to keep up with your group. There’s a lot of skipping, and the boss in the secret room is rarely killed. Right at the start, you will need to collect some Concentrated Blight to unlock the first door. You can find this down the first staircase to the left, just be careful of the patrolling archer.
Main Damage Type: Strike
This fight is the most difficult in the expedition. There are two main methods of killing him, “All In” and “4 and 1“.
The Caretaker spawns in a large boggy room, all alone. He’ll jump around a bit and will slap out a long tendril at the furthest player, so be careful if you’re playing range. When you get his health down to about 70%, he’ll move to the centre of the room and start putting up a wall of thorns. This is where the group has to decide whether to stay inside the wall with him, or to go outside and deal with the adds that spawn.
All In
The All In method is a DPS check. Everyone enters the ring with the Caretaker and does as much damage as they can. A Genesis Cap mushroom will spawn – you need to destroy the first one to avoid a wipe. The person who kills the Genesis Cap will receive an Empower buff. After, he’ll start diving under the floor and emerging periodically to attack. You can just avoid the lunge by watching and moving. After 7 lunges, the Caretaker will stand up and you can fight him again. Sometimes the walls will go down and let in the adds at this point, so you have to kill him very quickly. If the group can’t kill him fast enough and ends up dying to the adds, you may need to try the 4 and 1 method.
4 and 1
This method involves sending one player (usually the tank) inside the thorn wall, while the rest remain outside. The tank needs to play defensively and also destroy the Genesis Cap mushroom when it spawns. Outside the wall, there will be three lots of adds spawn, the first one on the side near the entrance. A point will light up, indicating where the spawn is going to occur. The outside group need to kill each spawn of adds as quickly as they can, then move clockwise around the wall to fight the next group. After a period of time, the walls will come down, allowing the tank to help with any remaining enemies. The Caretaker will go into the wall phase again, this time everyone should go in and do the All In method as outlined above.
Main Damage Type: Nature and Strike
The Greenskeeper is a snake-like boss, with poison to boot. The main attacks are Strike damage, but you should be able to avoid those. The AOE poison and ranged attacks are Nature damage and it’s more likely you might be hit by these. This is a relatively easy fight, as long as you know what to expect.
- Poison Pools – if you see a stream of poison headed your way, run to the edge of the arena. A large pool of poison is about to appear at your feet, so you need to get it as far from the group as you can. Also try to avoid dropping it on boulders if possible.
- Scream – if you’re playing ranged, the Greenskeeper may send out a scream wave at you. This can be dodged.
- Projectile – she also throws three quick projectiles, which can also be dodged
- Boulder – an outline of a circle will appear on the floor at the feet of a player, just before a boulder drops. You can easily move out of the way in time if you see it. These boulders are used later, so it’s important there is room around the back. Make sure you’re not fighting at the edge of the arena, especially if you are ranged.
- Burrow – the Greenskeeper will tunnel under the ground and come up under a player. If you get hit, it does a large amount of Strike damage. It will keep tunnelling to the furthest player, so to shorten this section, the group can stand together in a Sacred Ground and block.
- The Floor is Poison – later in the fight, the floor will be covered in a wavy poison. If there is no boulder between you and the Greenskeeper, you’ll be instantly killed. Everyone should hide behind a boulder, unless you have Defy Death, in which case you can live through it.
Interesting Loot
- M3 – Blighted Growth’s Set – Light armour with Nature Harnessing and Shirking Fortification, upgradeable.
- M3 – Mossbourne weapon set for skins – split stat Con/Weapon scaling attribute, Mortal Power/Blessed, Weapon Ability Perk.
- Garden’s Amulet – Health, Fortified + Random perk and attribute.
- Garden’s Ring – Keen Awareness, Hearty + Random perk and attribute.
- Garden’s Earring – Healthy Toast, Nimble + Random perk and attribute.
The Lazarus Instrumentality
Enemy Type: Ancient
Weaknesses: 30% Lightning 20% Strike 15% Void
Consumables
- Ancient Ward potion – 10% damage absorption
- Ancient Coating – 15% bonus damage
- Ancients Combat Trophy – 3/4/5% bonus damage x3
- Strike damage – War Hammer, Flail
- Topaz gem in weapon for Lightning damage
Note: *Elemental damage gems in your weapons are simply recommendations based on the elements your enemies are weakest to. Your playstyle may suit non-elemental gems better and you are encouraged to continue using those if so.
Artifact: Spark of Mjölnir
Dropped by Chardis.
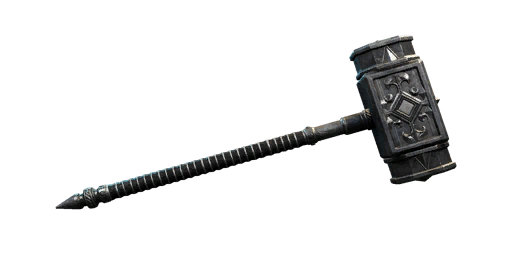
- +38 Magnify (selectable attribute)
- Mjölnir Blessing: 99% of hammer damage is converted to lightning, and you deal 20% more lightning damage with both weapons.
- Spark: Mighty Gavel causes a lightning strike that inflicts a 30% weaken for 7s.
- Refreshing Mighty Gavel: Mighty Gavel hits reduce the ability’s cooldown by 10% (Max 2 activations per impact).
- Refreshing Move: Light and Heavy attacks reduce your active weapon cooldowns by 2.5% (0.2s cooldown).
- Cannot add Gem Setting Pin
Strategy and tips
Lazarus is a dungeon of puzzles, the first being the Door Room. Mobs spawn in front of a door with three spaces for symbols above it. The first symbol is lit up, and you need to stand on its match from the circle on the floor in the middle of the room. This will open the door and release more enemies, lighting up the next symbol, and so on. When the third symbol is activated, the door closes and another door to the right opens. The symbols are best activated by someone with range, usually the healer. The key is to open them fast enough to keep the fight flowing but not so fast the team gets overwhelmed. It’s good to kill the archers before moving to the next door.
When you get to Cilla, one person should run across to talk to her while the rest fight the enemies. The next fight, Alcyon the mage, can be challenging. The Overhead Staff attack does heavy Strike damage, while all his spells do Void. Look out for him raising his staff above his head and be ready to dodge. The two archers can also be problematic in this fight, so try to clear them early.
Be careful in the handwashing room, as using the fountain will spawn the mini-boss by the door. Make sure everyone is through before you wash your hands. Use the architecture in the room to get out of the ranged attacks line of sight to bring them to you, or just kill the archers quickly.
Main Damage Type: Arcane
Physical Phase: Cilla is a fairly straightforward fight, to begin with. While the tank holds her aggro, the DPS hit her from behind. She has a buff that increases stacks over time, making her hit harder. There are three ports in the floor, where a stone orb can emerge from. Once an orb has risen, you can interact with it to reset the stacks. This will also progress her into the next phase.
If you can withstand the damage through good tanking and healing, the game forces the next phase by reducing damage done to Cilla until the orb is pulled.
Magical Phase: In the magical phase, it is important that the team clump together. Cilla will cast a spell that makes each player leave a pool of Arcane damage at their feet. You have a few seconds to get to a clear area before she makes it explode. She also shoots out orbs that will root you in place if you touch them.
Main Damage Type: Strike and Arcane
Chardis is about the least mobile boss in the world of Aeternum. He is a giant stone automaton, who uses his detachable hands and a beam from his single eye to attempt to defeat you. When he first awakens, there will be an orb on each side of the room, trapped in a force field. You need to break the field to release the orb, which will spawn a mage over an orb port on the ground. Kill the mage and place the orb.
To fight Chardis, the whole group should stand at the edge of the arena closest to him, in a Sacred Ground. You can block or avoid most of his physical attacks. If you get a symbol over your head, it means you are going to drop a Slicer. Head to the back of the arena to drop it, then return to the fight.
After some time, Chardis will start beaming one player with his eye. This player needs to run to the orb that was placed previously, which will cause both the orb and Chardis to drop to the ground. Once down, players can do increased damage so be sure to use all your Oblivion and Rend to make the most of this advantage.
If there is no orb up, the beam will continue damaging the player it is on. With careful healing, lifesteal, etc, players can continue to fight Chardis while someone is being beamed. But where possible, the orb is always the better option. If an orb is available but not placed, everyone except the healer should work to place that orb.
Interesting Loot
- M3 – Chardis’ Set – Heavy armour with Slash Conditioning and Refreshing, upgradeable.
- M3 – Bone Wrought weapon set for skins – split stat Con/Weapon scaling attribute, Keenly Fortified/Blessed, Weapon Ability Perk.
- Instrumentality’s Amulet – Health, Shirking Debilitate Cleanse + Random perk and attribute.
- Instrumentality’s Ring – Sacred, Infected + Random perk and attribute.
- Instrumentality’s Earring – Healing Heart, Refreshing + Random perk and attribute.
Glacial Tarn
Enemy Type: Ancient and Human
Weaknesses: Ancient: 30% Lightning, 20% Strike, 15% Void. Human: 15% Slash
Note: there are multiple unique weaknesses in this expedition, see below for more details.
Consumables
- Ancient Ward potion | Human Ward potion – 10% damage absorption
- Ancient Coating | Human Coating – 15% bonus damage
- Ancients Combat Trophy | Human Combat Trophy – 3/4/5% bonus damage x3
- Strike damage – Hammer, Void damage – Void Gauntlet | Slash damage – Sword, Greatsword, Hatchet, Great Axe
- Topaz gem in weapon for Lightning damage*
Note: *Elemental damage gems in your weapons are simply recommendations based on the elements your enemies are weakest to. Your playstyle may suit non-elemental gems better and you are encouraged to continue using those if so.
Artifact: Deep Freeze
Dropped by Snorok Ice Fist.

- +38 Magnify (selectable attribute)
- Chilling End: Frozen, rooted or chilled enemies take 15% additional damage (on both weapons).
- Empty Socket: Attach a gem to add its effect.
- Vicious: +7% critical damage.
- Refreshing Move: Light and Heavy attacks reduce your active weapon cooldowns by 2.5% (0.2s cooldown).
Strategy and tips
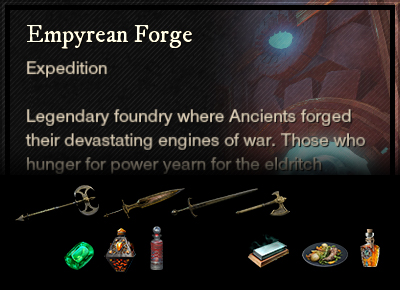
Partner to the Empyrean Forge, Glacial Tarn is the icy portion of the underground Great Cleave. You will see fire pits along your journey, which provide you with a buff that melts through ice-forged enemies. As long as one person with the buff has attacked the enemy, everyone will be able to do normal damage. If no one has the buff, your attacks become weak and the enemies take a long time to die. Sometimes the group needs to decide whether to go back for a buff or whether to run forward to the next one.
The puzzle rooms in the second half of the expedition require some coordination. Each door requires someone on the previous plate in order to unlock it. There are ice-forged enemies here and a sheet of ice that cleanses the fire buff, so again you’ll have to choose whether to fight or run. If you do run and jump down, make sure you step out of the archer’s line of sight.
Not only does Glacial Tarn have two enemy types, a number of the mobs have different weaknesses than normal Ancients and Humans do.
- 30% Fire, 30% Lightning, 15% Strike – Ancient Sanctifier, Ancient Elemental Archer
- 30% Nature, 15% Ice, 10% Strike – Protector of the Ancient Spring
Main Damage Type: Ice/Strike
Snorok is categorised as an Ancient Guardian but has his own specific weaknesses – 20% Lightning, 15% Thrust, 15% Fire.
This Ice Troll throws plenty of temper tantrums, smashing the ground and bringing down stalactites on unsuspecting heads. Ranged weapons can be useful here, due to the slow and hypothermia effects from his large blizzard spell, although if you can stand the cold, melee will kill him more quickly. DPS should probably use a Frozen protection amulet in here, while the tank would be best off with Strike protection. While all his moves are predictable, it’s still easy to just miss one mechanic and get wiped out with one hit, so play carefully.
- Frost Breath – Snorok will emit a cone of icy breath about half the arena’s length. Be aware that this will follow you as you move out of it, so you might need an extra dodge.
- Charge – If a blue symbol appears above your head, get ready to move. Snorok will make a quick charge across the room and being hit generally results in death. He’ll usually do two in a row, not always to the same person.
- Personal Pound – Stalactites will drop in the melee vicinity of the boss, doing strike damage.
- Stalactite Storm – Snorok will rage and stalactites will drop everywhere in the arena. You have some warning of the drop zone by a circle appearing on the ground just prior to the drop. These do high amounts of ice damage, so do your best to avoid being hit.
- Blizzard – Snorok summons a large aura of cold, that almost fills the arena. If you are playing ranged, look for the edge of the storm and stand outside it.
Main Damage Type: Slash/Ice
This is an interesting boss fight, because it includes multiple enemies. Our task is to defeat Ser Loth, but he is supported by the giant Ice Entity in the centre of the area and the four Spellcasters who bring it to life. Ser Loth does mostly slash damage with his giant sword, while the Ice Entity does Strike and Ice. The arena consists of four island platforms joined by bridges, that form a ring around the giant Ice Entity. It is possible to fall off, so watch your footing.
The four spellcasters spawn periodically, initially with a protective aura. When this aura drops, they can be attacked, and killing all four mages puts the Ice Entity to sleep temporarily. When this expedition was first released, there were many bugs, and if you killed the mages at the wrong time it could prevent the fight from being completed. So, many groups simply ignore the mages and dodge the Entity attacks.
- Ice Javelin – a blue symbol will appear above the head of the player Ser Loth is throwing the ice javelin toward, warning you to dodge. Anyone else in the line of fire will be hit.
- Ice Wave – same as the Ice Javelin but a wider wave.
- Frost Breath – The Ice Entity will breathe on an island, making it slippery and spikey and causing damage – you need to get off the island!
- Ice Bomb – The Ice Entity will throw a bomb onto one island – you need to destroy it before it explodes.
- Break Bridges – a red symbol will appear above all bridges just before the Ice Entity breaks them. If you are on a bridge, you will fall and be out of the fight. After a period of time, bridges can be rebuilt by interacting at the edge of the island.
- Weak Spots – three greenish discs will appear on the Ice Entity. While these are up, Ser Loth will resist most of your damage. Ranged attacks need to destroy the weak spots.
Interesting Loot
- M3 – Verglas weapon set for skins – Weapon scaling attribute (except War Hammer has Dex, Fire Staff has Str, others have secondary damage stat), Vicious/Blessed, Weapon Ability Perk.
- Frigid Dawn Set – Heavy armour with Elemental Aversion and Enchanted Ward (illegal combo), upgradeable.
- Verglas Amulet – Strength, Health, Divine + Random perk.
- Verglas Ring – Dexterity, Leeching, Keen Awareness + Random perk.
- Verglas Earring – Intelligence, Refreshing Toast, Nimble + Random perk.