This week's mutation is inescapably Icebound.
Looks like huddling up in Glacial Tarn will be a good way to finish the Season, as it has perfect synergy with the Ice mutation. It’s a pretty good week for tanks, with Void Darkplate and the Lost Stopwatch both up for grabs, as well as the Heavy Frigid Dawn gear. If you’re sick of waiting for random queues to pop as a DPS or Healer, maybe it’s time to start Tanking 🙂
Contents
Mutation

- Frozen – 50% of all enemy damage is Ice.
- Rime – Attacks cause a slow on hit – M1: Heavy and Special attacks, M2 & M3: All attacks.
- Glacial – Enemies with this title drop an ice crystal that slows and roots players.
- Shiver – Enemies with this title inflict Biting Cold on players who are not near them
Promotion

- Enraged – Each hit on an enemy generates a stack of Fury. At 20 stacks, the enemy grows 15% larger and does 50% increased damage.
- Shattering – Enemies deal additional stamina damage and apply a bleed on breaking your block. M1: 20% increased stamina damage, 5% bleed, M2 & M3: 75% increased stamina damage, 8% bleed.
Curse

- Unstable – After dodging, players receive a stack of Ice damage over time dealing 1.5% max health every second for 10 seconds.
- Overcharged – If Unstable expires with 3 active stacks, it drops a 3m zone that lasts 15 seconds and applies 10% max health Ice damage per second. Entering the zone will consume all stacks of Unstable and deal 30% max HP damage.
Consumables
- Frozen Protection Amulet
- Aquamarines in Armor/Jewelry
- Desert Sunrise
- Honing Stone
- Attribute Bonus Food
Gearing up
- M1 – Opals in your armor is fine
- M2 – Add the Frozen Protection Amulet
- M3 – Swap most of your Opals for Aquamarines
- Enchanted Ward – Aim for 4 or 5 pieces with this perk
- For more detailed advice on gear, check out our Gear Guide.
Avoid Ice Crystals
Glacial enemies will drop an ice crystal on death, that can root you in place. You have a couple of seconds to move out of the crystal’s radius before it snares you, so be aware of the glacial tag and ready to move. The crystals can be destroyed, but this takes extra time. Perks like Relentless Freedom, Berserking Purge, or the 300 Dex milestone perk can help get you out of a tight spot.
Huddle up in the cold
Shiver enemies will hurt anyone outside their frosty radius, so working as a close melee group works best with these. If your group is having trouble with enemy AOE damage or the backswing on their attacks, the healer can place a Sacred Ground for ranged players to stand in.
Combat slows with speed
To make up for the slows applied by Rime, you can use speedy perks to get the group running faster. Speed of Light, the final Beacon upgrade, is one option, or the Quick Shower upgrade on Ice Gauntlet’s Ice Shower gives a short speed boost. You can also apply your own personal hastes if you are using a weapon that has them.
M2 - The best defense is a good offense
It’s best to get in first and kill these guys fast. After being hit 20 times, Enraged enemies are going to get bigger and stronger. Your tank will also need to draw on more skills than right-click, with Shattering enemies around. A side-step can help avoid a hit without using precious stamina, if you have the footwork skills for it.
M3 - Don't Poop on the Group
While fully geared and optimised groups can power through multiple Overcharged pools of pain, civilised dodgers might prefer to drop their load in a corner away from others. The other option is to use your dodges carefully and never allow the full three stacks to build up.
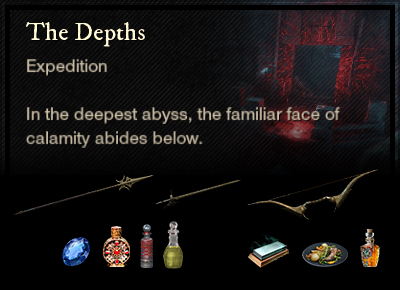
The Depths
Enemy Type: Corrupted
Weaknesses: 30% Arcane 20% Thrust 15% Nature
Consumables
- Corrupted Ward potion – 10% damage absorption
- Corrupted Coating – 15% bonus damage
- Corrupted Combat Trophy – 3/4/5% bonus damage x3
- Thrust damage – Spear, Rapier, Bow, Musket, Blunderbuss
- Sapphire gem in weapon for Arcane damage*
Note: *Elemental damage gems in your weapons are simply recommendations based on the elements your enemies are weakest to. Your playstyle may suit non-elemental gems better and you are encouraged to continue using those if so.
Artifact: Lost Stopwatch Amulet
Dropped by Commander Thorpe.

- +32 Magnify (selectable attribute)
- Stunny Gaze: Taunts are active. Generate 300% more threat. Stuns last 1s longer, but base damage is decreased by 10%.
- Empty Socket: Attach a gem to add its effect.
- Purify: When you are hit while below 50% Health, you lose all debuffs (90s cooldown. Does not trigger off persistent damage, DoT effects, or blocked attacks).
- Health: Increase max health by 7% of the base value.
Strategy and tips
There are lots of teleports, trigger platforms and azoth staff nodes in this expedition, as well as a plethora of ranged enemies. Use the twists and turns to your advantage by getting out of their line of sight and forcing them to come to you.
Main Damage Type: Void
The Archdeacon begins the fight in the centre of his arena, although he can move around if players do. He summons Corrupted dogs and has a nasty Ground Wave spell that you’ll need to dodge. Try to keep the dogs in the clump so they get killed by the hits on the Archdeacon.
When he gets to about 50% life, he’ll become invincible and channel a red beam to the east side of the arena. While the Archdeacon is invincible, mines will periodically spawn and if they are not destroyed they will explode and apply Void damage to everyone in the room. If you learn the timing, you can dodge this explosion. Two DPS should step on the teleport pad, which will take them up to a platform where two mages spawn. After killing the mages, one DPS needs to use their Azoth Staff on the node so they can both return to the main arena. Azamela will resume his normal state.
At about 20% health, the Archdeacon starts channelling again, this time with an additional green beam to the west side. You need to split the group and clear each platform as soon as you can. If the dogs are clear, the healer can remain on the ground and heal each side, but usually they will go up with the tank and DPS on the green side. Surviving the bomb damage at this point is the hardest part, clear quickly, dodge if you can, and use potions carefully to stay alive.
Main Damage Type: Fire
Thorpe has been with us since the first sea voyage to Aeternum, so we should be familiar with his moves by now. His great sword does a large amount of Fire damage as well as Slash. Even when behind him, some of his moves swing back, so DPS need to be careful. When he charges, stay out of the firey trail.
Thorpe is pretty chatty and you can use his voice lines to tell what is going to happen next.
- “Ha! Pathetic!” = he goes off the tank and attacks one of the other group members
- “This will be the last time we meet” = he rises and becomes invincible while he casts a beam that spawns two behemoths. Don’t get hit by the beam and kill the adds while the tank holds Thorpe away.
- “Prepare to have your soul crushed” = aka The Big Sticky Finger. Thorpe points a beam across the room and slowly rotates. It’s pretty slow so easy enough to stay away from or you can duck under it.
- “Time to taste Corrupted Steel” = slams down his sword – don’t be too close.
- “I will crush you beneath my heel, ant!” = he summons a beam of fire and directs it at one player, leaving a circle of fire on the floor.
Interesting Loot
- M3 – Expedition Captain’s Set – Heavy armour with Strike Conditioning and Grit Ward, upgradeable.
- M3 – Gleaming Pitch weapon set for skins – split stat Con/Weapon scaling attribute, Keenly Empowered/Blessed, Weapon Ability Perk.
- Deep Amulet – Health, Shirking DoT Cleanse + Random perk and attribute.
- Deep Ring – Keen Awareness, Enfeebling + Random perk and attribute.
- Deep Earring – Empowering Toast, Nimble + Random perk and attribute.
Barnacles and Black Powder
Enemy Type: Lost
Weaknesses: 30% Nature 15% Ice 10% Strike

Consumables
- Lost Ward potion (Angry Earth Ward for Nereid) – 10% damage absorption
- Lost Coating (Angry Earth for Nereid) – 15% bonus damage
- Lost Combat Trophy (Angry Earth for Nereid) – 3/4/5% bonus damage x3
- Nature/Strike/Ice damage – Life Staff, War Hammer, Flail, Ice Gauntlet
- Amber gem in weapon for Nature damage*
Note: *Elemental damage gems in your weapons are simply recommendations based on the elements your enemies are weakest to. Your playstyle may suit non-elemental gems better and you are encouraged to continue using those if so.
Artifact: Void Darkplate Heavy Chestwear
Dropped by Nereid.

- +32 Magnify (selectable attribute)
- Dark Reinforced: Your armor is increased by 20%.
- Empty Socket: Attach a gem to add its effect.
- Enchanted Ward: -4% damage from light and heavy attacks.
- Physical Aversion: Receive 4.5% less damage from ranged, physical attacks.
Strategy and tips
This is a very pirate-y expedition, with lots of explosions and gunshots. Watch out for bombers – you can root them and run, or if you’re clever you can lead them to their friends and use them as a weapon. To beat the mutation timer, players generally tend to skip past mobs and group them up. Be aware of ghosts and try to kill them rather than skipping, since they cast spells that slow you down.
Main Damage Type: Fire
The Admiral is a huge pirate with interesting feet and some really big balls. The fight seems deceptively simple at first, with everyone beating on him. He throws explosives, and if you see a red circle on the floor, you’re going to take some fire damage.
At about 75% health, he jumps up onto the ship at the back of the arena so you can’t hit him. He’ll usually spawn a group of minions at the same time. The Admiral throws down kegs and cannon balls, and lines of fire appear on the floor. The kegs drop a radius of black powder which causes a Fire DoT. You can pick up the cannon balls, load them into the two cannons at the side of the arena and use them to shoot Admiral Blackpower. After three shots, he will come back to the fight.
This happens again at 50% life and about 25%, with more fire lines each time, which you can just dodge through. At the end of the fight, after you pick up your bag, Admiral Blackpowder has one last explosive surprise.
Main Damage Type: Nature
Nereid is an interesting boss. First of all, she is Angry Earth, not Lost, so you’ll want to change your wards and coatings. She also has different Weaknesses to either regular Angry Earth or Lost – 30% Ice, 20% Strike.
Her attacks do a range of physical damage types, and she uses a Lightning spear, but the most troublesome part of this fight is the wind, which does Nature damage and pushes you around. So we recommend using some Nature protection to help out if you get stuck, and just avoiding the rest.
Nereid will fight in the centre of the arena and periodically spin along the cross pattern on the floor. It’s usually safest to stand on a diagonal, but be ready to move if she comes your way. There is a predictable pattern to her movement that you can learn. When Nereid moves to the centre of the arena and raises her staff, stand back and make sure you are on the diagonal. Gusts of wind will shoot out along the lines of the cross.
It’s possible to play this fight as ranged, from the edge of the room, as long as you keep an eye out for the tornados that circle the arena. Toward the end, there is a lot of wind and lightning (it’s very very frightening), so be careful of your positioning.
Interesting Loot
- M3 – Siren’s Set – Medium armour with Health and Elemental Aversion, upgradeable.
- M3 – Admiral’s Set – Light armour with Ice Harnessing and Elemental Aversion, upgradeable.
- M3 – Pirated weapon set for skins – split stat Con/Weapon scaling attribute, Rogue/Keen Speed/Desperate Prayer, Weapon Ability Perk.
- Waterlogged Amulet – Health, Refreshing + Random perk and attribute.
- Waterlogged Ring – Keen Awareness, Leeching + Random perk and attribute.
- Waterlogged Earring – Refreshing Toast, Fortifying Toast + Random perk and attribute.
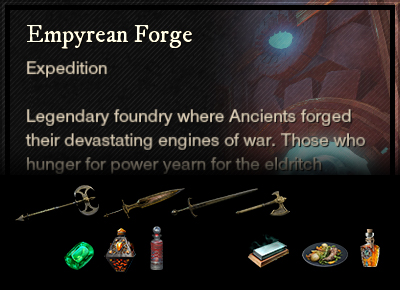
Glacial Tarn
Enemy Type: Ancient and Human
Weaknesses: Ancient: 30% Lightning, 20% Strike, 15% Void. Human: 15% Slash
Note: there are multiple unique weaknesses in this expedition, see below for more details.
Consumables
- Ancient Ward potion | Human Ward potion – 10% damage absorption
- Ancient Coating | Human Coating – 15% bonus damage
- Ancients Combat Trophy | Human Combat Trophy – 3/4/5% bonus damage x3
- Strike damage – Hammer, Void damage – Void Gauntlet | Slash damage – Sword, Greatsword, Hatchet, Great Axe
- Topaz gem in weapon for Lightning damage*
Note: *Elemental damage gems in your weapons are simply recommendations based on the elements your enemies are weakest to. Your playstyle may suit non-elemental gems better and you are encouraged to continue using those if so.
Artifact: Deep Freeze
Dropped by Snorok Ice Fist.

- +38 Magnify (selectable attribute)
- Chilling End: Frozen, rooted or chilled enemies take 15% additional damage (on both weapons).
- Empty Socket: Attach a gem to add its effect.
- Vicious: +7% critical damage.
- Refreshing Move: Light and Heavy attacks reduce your active weapon cooldowns by 2.5% (0.2s cooldown).
Strategy and tips
Partner to the Empyrean Forge, Glacial Tarn is the icy portion of the underground Great Cleave. You will see fire pits along your journey, which provide you with a buff that melts through ice-forged enemies. As long as one person with the buff has attacked the enemy, everyone will be able to do normal damage. If no one has the buff, your attacks become weak and the enemies take a long time to die. Sometimes the group needs to decide whether to go back for a buff or whether to run forward to the next one.
The puzzle rooms in the second half of the expedition require some coordination. Each door requires someone on the previous plate in order to unlock it. There are ice-forged enemies here and a sheet of ice that cleanses the fire buff, so again you’ll have to choose whether to fight or run. If you do run and jump down, make sure you step out of the archer’s line of sight.
Not only does Glacial Tarn have two enemy types, a number of the mobs have different weaknesses than normal Ancients and Humans do.
- 30% Fire, 30% Lightning, 15% Strike – Ancient Sanctifier, Ancient Elemental Archer
- 30% Nature, 15% Ice, 10% Strike – Protector of the Ancient Spring
Main Damage Type: Ice/Strike
Snorok is categorised as an Ancient Guardian but has his own specific weaknesses – 20% Lightning, 15% Thrust, 15% Fire.
This Ice Troll throws plenty of temper tantrums, smashing the ground and bringing down stalactites on unsuspecting heads. Ranged weapons can be useful here, due to the slow and hypothermia effects from his large blizzard spell, although if you can stand the cold, melee will kill him more quickly. DPS should probably use a Frozen protection amulet in here, while the tank would be best off with Strike protection. While all his moves are predictable, it’s still easy to just miss one mechanic and get wiped out with one hit, so play carefully.
- Frost Breath – Snorok will emit a cone of icy breath about half the arena’s length. Be aware that this will follow you as you move out of it, so you might need an extra dodge.
- Charge – If a blue symbol appears above your head, get ready to move. Snorok will make a quick charge across the room and being hit generally results in death. He’ll usually do two in a row, not always to the same person.
- Personal Pound – Stalactites will drop in the melee vicinity of the boss, doing strike damage.
- Stalactite Storm – Snorok will rage and stalactites will drop everywhere in the arena. You have some warning of the drop zone by a circle appearing on the ground just prior to the drop. These do high amounts of ice damage, so do your best to avoid being hit.
- Blizzard – Snorok summons a large aura of cold, that almost fills the arena. If you are playing ranged, look for the edge of the storm and stand outside it.
Main Damage Type: Slash/Ice
This is an interesting boss fight, because it includes multiple enemies. Our task is to defeat Ser Loth, but he is supported by the giant Ice Entity in the centre of the area and the four Spellcasters who bring it to life. Ser Loth does mostly slash damage with his giant sword, while the Ice Entity does Strike and Ice. The arena consists of four island platforms joined by bridges, that form a ring around the giant Ice Entity. It is possible to fall off, so watch your footing.
The four spellcasters spawn periodically, initially with a protective aura. When this aura drops, they can be attacked, and killing all four mages puts the Ice Entity to sleep temporarily. When this expedition was first released, there were many bugs, and if you killed the mages at the wrong time it could prevent the fight from being completed. So, many groups simply ignore the mages and dodge the Entity attacks.
- Ice Javelin – a blue symbol will appear above the head of the player Ser Loth is throwing the ice javelin toward, warning you to dodge. Anyone else in the line of fire will be hit.
- Ice Wave – same as the Ice Javelin but a wider wave.
- Frost Breath – The Ice Entity will breathe on an island, making it slippery and spikey and causing damage – you need to get off the island!
- Ice Bomb – The Ice Entity will throw a bomb onto one island – you need to destroy it before it explodes.
- Break Bridges – a red symbol will appear above all bridges just before the Ice Entity breaks them. If you are on a bridge, you will fall and be out of the fight. After a period of time, bridges can be rebuilt by interacting at the edge of the island.
- Weak Spots – three greenish discs will appear on the Ice Entity. While these are up, Ser Loth will resist most of your damage. Ranged attacks need to destroy the weak spots.
Interesting Loot
- M3 – Verglas weapon set for skins – Weapon scaling attribute (except War Hammer has Dex, Fire Staff has Str, others have secondary damage stat), Vicious/Blessed, Weapon Ability Perk.
- Frigid Dawn Set – Heavy armour with Elemental Aversion and Enchanted Ward (illegal combo), upgradeable.
- Verglas Amulet – Strength, Health, Divine + Random perk.
- Verglas Ring – Dexterity, Leeching, Keen Awareness + Random perk.
- Verglas Earring – Intelligence, Refreshing Toast, Nimble + Random perk.