This week's mutation is organically Overgrown.
It’s your chance to pick up the Endless Thirst earring artifact if you’ve been waiting, and Void Darkplate is back for all the tanks out there. Not much synergy going on with the Nature mutation, so pick whichever one you like.
Contents
Mutation

- Arboreal – 50% of all enemy damage is Nature.
- Bramble – Attacks cause damage on hit – M1: 20% Nature damage, M2 & M3: 40% Nature damage.
- Compost – Enemies with this title drop a healing circle on death, healing enemies for 3% per second.
- Toxic – Enemies with this title drop a poison spawn that deals Nature damage over time and seeks out the furthest player to cast root on them. M1: 20% Nature DoT, M2 & M3: 40% Nature DoT.
Promotion

- Vampiric – Enemies heal a percentage of damage done. M1: 20%, M2 & M3: 40%.
- Phalanx – Enemies cast a shield that blocks ranged attacks.
Curse

- Blowback – Using abilities builds up to cause a zone of Silence that prevents the use of abilities. When it expires, the zone explodes, dealing 65% Nature damage.
- Truncated – During active periods of Silence, players lose natural mana regen. Standing in the Silence zone grants 25 mana per 0.75 seconds.
Consumables
- Nature Protection Amulet
- Ambers in Armor/Jewelry
- Desert Sunrise
- Nature Absorption Potion
- Powerful Honing Stone
- Attribute bonus food
Gearing up
- M1 – Opals in your armor is fine
- M2 – Add the Nature Protection Amulet
- M3 – Swap most of your Opals for Ambers
- Enchanted Ward – Aim for 4 or 5 pieces with this perk
- For more detailed advice on gear, check out our Gear Guide.
Get out of the Compost
If a Compost mob drops while you are still fighting, the tank should reposition to get the mobs out of the compost healing circle. You can also use the Bile Bomb Heartrune, Plagued Strikes, or other disease to reduce the effectiveness of the healing.
Don't get caught
Toxic poison spawn will chase down the furthest player, so if you’re outside the clump playing range, keep moving. You can easily outmanoeuvre the little fella but watch out if you get caught as it’ll hold you down and DoT you to death. Perks like Relentless Freedom, Berserking Purge, or the 300 Dex milestone perk can help you escape if you get stuck.
M2 - Melee and chunder
There’s a penalty for using ranged attacks once again, with Phalanx enemies putting up a deflecting shield, so make sure you have at least one melee weapon. Vampiric slows down the time to kill on mobs that have it, so slotting your Bile Bomb Heartrune can help.
M3 - Strategic Abilities
Silence is incredibly annoying for every class. Tanks can’t taunt, Healers can’t heal, DPS can’t debuff or optimise damage. The excellent thing about Blowback is that you can see the gauge and can set off the silence deliberately, before entering a big fight. If you can’t help setting it off in the middle of a fight, try to stack and then move the group.
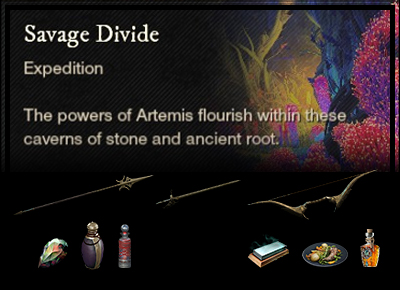
Savage Divide
Enemy Type: Beast
Weaknesses: 20% Thrust
Consumables
- Beast Ward potion – 10% damage absorption
- Beast Coating – 15% bonus damage
- Wildlife Combat Trophy – 3/4/5% bonus damage x3
- Thrust damage – Spear, Rapier, Bow, Musket, Blunderbuss
Artifact: Endless Thirst Earring
Dropped by Mahantaram.

- +32 Magnify (selectable attribute)
- The Thirst: Healing consumables are 33% stronger, but Survival and Mana Potion cooldowns are 25% longer.
- Empty Socket: Attach a gem to add its effect.
- Empowering Toast: On Potion Drink: Gain 10% Empower for 8s (10s cooldown).
- Fortifying Toast: On Potion Drink: Gain 20% Fortify for 8s (10s cooldown).
Strategy and tips
Even after running it a few times, it’s still easy to get lost in the Savage Divide. The pathways look very similar and there are repeated mechanics throughout. To open doors, someone will need to pick up a ball and place it on the pedestal beside the door. If they get hit, the ball will usually reset. Fun fact about Savage Divide, it has two gypsum nodes that yield a gypsum orb each – keep your eyes out for them!
As well as the standard Thrust damage weakness that Beasts have, elemental enemies in the Savage Divide are weak to their opposing element. So Ice Mammoths and Ice Hurlers have a 15% Fire weakness, Nature beasts have a 15% Lightning weakness and Lightning beasts have a 15% Nature weakness. Plants, such as the Razor Lotus, are Angry Earth rather than Beast.
Main Damage Type: Elemental
Both boss fights in Savage Divide employ all the elements, to keep you on your toes. Kurok is a large gorilla, with no weaknesses. His arena has four shrines, for the elements Fire, Ice, Lightning and Nature. When he leaps to a shrine, he will activate it, and an AoE attack of that element will periodically spawn at the shrine and move around the room. After the element has been up for a short time, the shrine becomes active and a player can interact with it to become an antidote for that damage type. They will have a small elemental disc at their feet and when they stand on the AoE attack zone, it neutralises it.
After a player has activated the antidote, Kurok will move to a different elemental shrine and start that one, requiring another player to get the antidote disc and clean up any AoE damage zones. Groups will often hold off activating the antidote to minimise the amount of different elements spawning, especially if the first shrine is Nature. While an element is not being neutralised, Kurok will build stacks of that element. At 10 stacks, he does an AoE attack, which you can dodge if you’re watching. For the last 10% of his health, he does Void damage and builds Void stacks. This is the most dangerous part of the fight and someone often goes down.
If you see a red target appear above your head during the fight, Kurok is about to throw something at you, so be ready to dodge.
Main Damage Type: Elemental
Mahantaram is a mammoth who spawns various elemental conduits while he tramples all who dare enter his cave. Like Kurok, he has no weaknesses and commands all elements. It is important that the DPS destroy the conduits as quickly as possible before returning to damage the boss. The tank can maintain aggro and move Mahantaram around the room to keep out of elemental damage zones.
If you see a red target appear above your head during the fight, Mahantaram is about to charge at you, so be ready to dodge.
Interesting Loot
- M3 – Primal weapon set for skins – split stat Con/Weapon scaling attribute, Keenly Empowered/Blessed, Weapon Ability Perk.
- Primal Amulet – Strength, Health, Empowered + Random perk.
- Primal Ring – Dexterity, Crippling, Hearty + Random perk.
- Primal Earring – Intelligence, Refreshing Toast, Healing Heart + Random perk.
Barnacles and Black Powder
Enemy Type: Lost
Weaknesses: 30% Nature 15% Ice 10% Strike

Consumables
- Lost Ward potion (Angry Earth Ward for Nereid) – 10% damage absorption
- Lost Coating (Angry Earth for Nereid) – 15% bonus damage
- Lost Combat Trophy (Angry Earth for Nereid) – 3/4/5% bonus damage x3
- Nature/Strike/Ice damage – Life Staff, War Hammer, Flail, Ice Gauntlet
- Amber gem in weapon for Nature damage*
Note: *Elemental damage gems in your weapons are simply recommendations based on the elements your enemies are weakest to. Your playstyle may suit non-elemental gems better and you are encouraged to continue using those if so.
Artifact: Void Darkplate Heavy Chestwear
Dropped by Nereid.

- +32 Magnify (selectable attribute)
- Dark Reinforced: Your armor is increased by 20%.
- Empty Socket: Attach a gem to add its effect.
- Enchanted Ward: -4% damage from light and heavy attacks.
- Physical Aversion: Receive 4.5% less damage from ranged, physical attacks.
Strategy and tips
This is a very pirate-y expedition, with lots of explosions and gunshots. Watch out for bombers – you can root them and run, or if you’re clever you can lead them to their friends and use them as a weapon. To beat the mutation timer, players generally tend to skip past mobs and group them up. Be aware of ghosts and try to kill them rather than skipping, since they cast spells that slow you down.
Main Damage Type: Fire
The Admiral is a huge pirate with interesting feet and some really big balls. The fight seems deceptively simple at first, with everyone beating on him. He throws explosives, and if you see a red circle on the floor, you’re going to take some fire damage.
At about 75% health, he jumps up onto the ship at the back of the arena so you can’t hit him. He’ll usually spawn a group of minions at the same time. The Admiral throws down kegs and cannon balls, and lines of fire appear on the floor. The kegs drop a radius of black powder which causes a Fire DoT. You can pick up the cannon balls, load them into the two cannons at the side of the arena and use them to shoot Admiral Blackpower. After three shots, he will come back to the fight.
This happens again at 50% life and about 25%, with more fire lines each time, which you can just dodge through. At the end of the fight, after you pick up your bag, Admiral Blackpowder has one last explosive surprise.
Main Damage Type: Nature
Nereid is an interesting boss. First of all, she is Angry Earth, not Lost, so you’ll want to change your wards and coatings. She also has different Weaknesses to either regular Angry Earth or Lost – 30% Ice, 20% Strike.
Her attacks do a range of physical damage types, and she uses a Lightning spear, but the most troublesome part of this fight is the wind, which does Nature damage and pushes you around. So we recommend using some Nature protection to help out if you get stuck, and just avoiding the rest.
Nereid will fight in the centre of the arena and periodically spin along the cross pattern on the floor. It’s usually safest to stand on a diagonal, but be ready to move if she comes your way. There is a predictable pattern to her movement that you can learn. When Nereid moves to the centre of the arena and raises her staff, stand back and make sure you are on the diagonal. Gusts of wind will shoot out along the lines of the cross.
It’s possible to play this fight as ranged, from the edge of the room, as long as you keep an eye out for the tornados that circle the arena. Toward the end, there is a lot of wind and lightning (it’s very very frightening), so be careful of your positioning.
Interesting Loot
- M3 – Siren’s Set – Medium armour with Health and Elemental Aversion, upgradeable.
- M3 – Admiral’s Set – Light armour with Ice Harnessing and Elemental Aversion, upgradeable.
- M3 – Pirated weapon set for skins – split stat Con/Weapon scaling attribute, Rogue/Keen Speed/Desperate Prayer, Weapon Ability Perk.
- Waterlogged Amulet – Health, Refreshing + Random perk and attribute.
- Waterlogged Ring – Keen Awareness, Leeching + Random perk and attribute.
- Waterlogged Earring – Refreshing Toast, Fortifying Toast + Random perk and attribute.
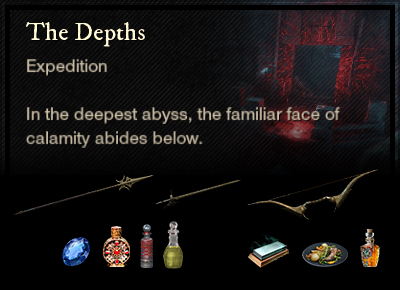
The Depths
Enemy Type: Corrupted
Weaknesses: 30% Arcane 20% Thrust 15% Nature
Consumables
- Corrupted Ward potion – 10% damage absorption
- Corrupted Coating – 15% bonus damage
- Corrupted Combat Trophy – 3/4/5% bonus damage x3
- Thrust damage – Spear, Rapier, Bow, Musket, Blunderbuss
- Sapphire gem in weapon for Arcane damage*
Note: *Elemental damage gems in your weapons are simply recommendations based on the elements your enemies are weakest to. Your playstyle may suit non-elemental gems better and you are encouraged to continue using those if so.
Artifact: Lost Stopwatch Amulet
Dropped by Commander Thorpe.

- +32 Magnify (selectable attribute)
- Stunny Gaze: Taunts are active. Generate 300% more threat. Stuns last 1s longer, but base damage is decreased by 10%.
- Empty Socket: Attach a gem to add its effect.
- Purify: When you are hit while below 50% Health, you lose all debuffs (90s cooldown. Does not trigger off persistent damage, DoT effects, or blocked attacks).
- Health: Increase max health by 7% of the base value.
Strategy and tips
There are lots of teleports, trigger platforms and azoth staff nodes in this expedition, as well as a plethora of ranged enemies. Use the twists and turns to your advantage by getting out of their line of sight and forcing them to come to you.
Main Damage Type: Void
The Archdeacon begins the fight in the centre of his arena, although he can move around if players do. He summons Corrupted dogs and has a nasty Ground Wave spell that you’ll need to dodge. Try to keep the dogs in the clump so they get killed by the hits on the Archdeacon.
When he gets to about 50% life, he’ll become invincible and channel a red beam to the east side of the arena. While the Archdeacon is invincible, mines will periodically spawn and if they are not destroyed they will explode and apply Void damage to everyone in the room. If you learn the timing, you can dodge this explosion. Two DPS should step on the teleport pad, which will take them up to a platform where two mages spawn. After killing the mages, one DPS needs to use their Azoth Staff on the node so they can both return to the main arena. Azamela will resume his normal state.
At about 20% health, the Archdeacon starts channelling again, this time with an additional green beam to the west side. You need to split the group and clear each platform as soon as you can. If the dogs are clear, the healer can remain on the ground and heal each side, but usually they will go up with the tank and DPS on the green side. Surviving the bomb damage at this point is the hardest part, clear quickly, dodge if you can, and use potions carefully to stay alive.
Main Damage Type: Fire
Thorpe has been with us since the first sea voyage to Aeternum, so we should be familiar with his moves by now. His great sword does a large amount of Fire damage as well as Slash. Even when behind him, some of his moves swing back, so DPS need to be careful. When he charges, stay out of the firey trail.
Thorpe is pretty chatty and you can use his voice lines to tell what is going to happen next.
- “Ha! Pathetic!” = he goes off the tank and attacks one of the other group members
- “This will be the last time we meet” = he rises and becomes invincible while he casts a beam that spawns two behemoths. Don’t get hit by the beam and kill the adds while the tank holds Thorpe away.
- “Prepare to have your soul crushed” = aka The Big Sticky Finger. Thorpe points a beam across the room and slowly rotates. It’s pretty slow so easy enough to stay away from or you can duck under it.
- “Time to taste Corrupted Steel” = slams down his sword – don’t be too close.
- “I will crush you beneath my heel, ant!” = he summons a beam of fire and directs it at one player, leaving a circle of fire on the floor.
Interesting Loot
- M3 – Expedition Captain’s Set – Heavy armour with Strike Conditioning and Grit Ward, upgradeable.
- M3 – Gleaming Pitch weapon set for skins – split stat Con/Weapon scaling attribute, Keenly Empowered/Blessed, Weapon Ability Perk.
- Deep Amulet – Health, Shirking DoT Cleanse + Random perk and attribute.
- Deep Ring – Keen Awareness, Enfeebling + Random perk and attribute.
- Deep Earring – Empowering Toast, Nimble + Random perk and attribute.