Starstone Barrows
Enemy Type: Ancient and Lost
Weaknesses: Ancient: 30% Lightning 20% Strike 15% Void. Lost: 30% Nature 15% Ice 10% Strike
Consumables
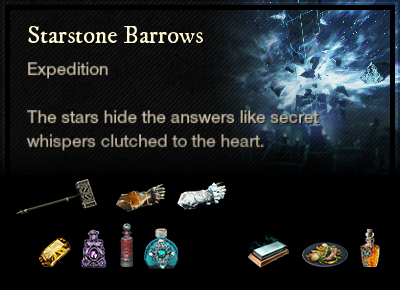
- Ancient Ward potion | Lost Ward potion – 10% damage absorption
- Ancient Coating | Lost Coating – 15% bonus damage
- Ancients Combat Trophy | Lost Combat Trophy – 3/4/5% bonus damage x3
- Strike damage – Hammer, Void damage – Void Gauntlet | Nature/Strike/Ice damage – Life Staff, War Hammer, Flail, Ice Gauntlet
- Topaz gem in weapon for Lightning damage* | Amber gem Nature damage*
Faction Missions: Oxboro or faction base in Everfall
Note: *Elemental damage gems in your weapons are simply recommendations based on the elements your enemies are weakest to. Your playstyle may suit non-elemental gems better and you are encouraged to continue using those if so.
Dropped by Greundgul the Regent.
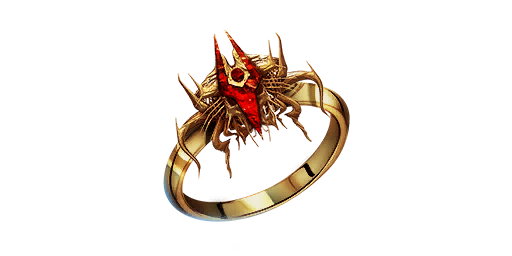
- Ghoul’s Harmony: +25% lifesteal and all healing from lifesteal is increased by 5%. However, you deal -20% base damage, unless the target is diseased, then damage is only reduced by 15%.
- Empty Socket: Attach a gem to add its effect.
- [offense charm] Leeching II: Heal for 3.2-4% of the damage you deal (Does not trigger off persistent damage or DoT effects). [Max Stacks: 5]
- Keen Switch II: On weapon swap, increase crit chance by 7.1-9% for 3s or until the next hit (3s cooldown) [Max Stacks: 1]
- Empty Offense Slot
Strategy and tips
While it has the same name, this is not the Starstone Barrows you entered on your journey growing up in Aeternum so many levels ago. There is a break in the walls of the dungeon and you’ll find yourself in Amrine, fighting Lost, for a period of time. This is a fun dungeon full of nostalgia, twists and tricks. Be careful of the purple beams as they will kill you outright should you wander into one.
When you emerge from the Lost tunnels and return to fighting Ancients, the first reliquary can be used to let the group through both sets of beams to continue fighting, while the torchbearer goes up the stairs to turn the power off. This saves everyone from standing around just waiting.
Remember to carry extra consumables so you can swap wards and coatings in higher level mutations, it can mean the difference between life and death.
Main Damage Type: Strike
Simon Grey has grown up too and is level 70 in mutated expeditions. His attacks are scaled up accordingly and his Overhead Slam can outright kill a low con, under-geared DPS. Apart from that, this is a fairly straightforward fight.
- Overhead Slam: Simon raises both hands over his head and slams down, causing AoE Strike damage. Look for the movement and be ready to dodge.
- Minions: Simon will spawn 3 lost enemies. If you don’t kill them in time, he will suck them in for a life leech.
- Vomit: Simon’s vomit is pretty toxic and will cause a slow as well as reduce incoming healing.
Main Damage Type: Slash
Greundgul is an Ancient construct with a very large sword. Be careful of the backswing when fighting behind her. She’s quite mobile and will push the group around the arena. Make sure you have someone with a ranged attack to stop her when she gets to the jumping phase.
- Throw Bone: Greundgul throws a bone at the furthest player, that spawns skeletal minions. These are only a mild annoyance unless the fight takes long enough to create too many of them. This can be minimised by the group clumping close to the boss, so the bone and adds get destroyed by everyone’s attacks.
- Jumping Phase: After the first time Greundgul’s health reaches almost zero, she will reassemble herself in the centre of the arena and then leap at a random player, sending out a shockwave of damage with each jump. To control where she jumps, the group should all stack on one player. If you can hit her in the eye as she lands, she’ll stop jumping. The jumping phase repeats periodically until she finally dies.
Interesting Loot
- M3 – Simon Grey’s Set – Medium armour with Arcane Harnessing and Health, upgradeable.
- M3 – Stormbound weapon set for skins – Acutely Empowered, Gem slot, Keenly Jagged/Blessed, Weapon Ability Perk.