Tempest's Heart
Enemy Type: Corrupted
Weaknesses: 30% Arcane 20% Thrust 15% Nature

Consumables
- Corrupted Ward potion – 10% damage absorption
- Corrupted Coating – 15% bonus damage
- Corrupted Combat Trophy – 3/4/5% bonus damage x3
- Thrust damage – Spear, Rapier, Bow, Musket, Blunderbuss
- Sapphire gem in weapon for Arcane damage*
Faction Missions: Alazar’s Recall in Shattered Mountain
Note: *Elemental damage gems in your weapons are simply recommendations based on the elements your enemies are weakest to. Your playstyle may suit non-elemental gems better and you are encouraged to continue using those if so.
Dropped by Isabella.
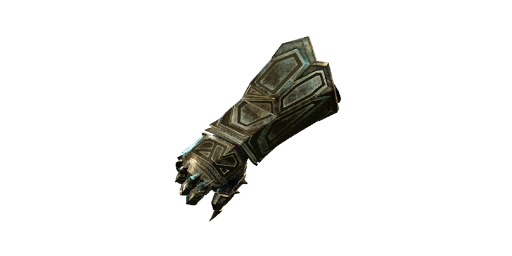
- Magnetic: Crit chance increased by 50%, but crit damage reduced by up to 30%.
- Empty Socket: Attach a gem to add its effect.
- Breaker Bypass II: When an attack is blocked, gain a stack of 3.1-4% stamina damage increase for 4s. (Max 10 Stacks) [Max Stacks: 1]
- [defense charm] Physical Aversion: Receive 2.8-3.6% less damage from ranged, physical attacks. [Max Stacks: 5]
- Empty Offense Slot
Strategy and tips
The Tempest is a long dungeon, so players often like to run from one gate to another and fight whatever follows, when it catches up. This can be a little overwhelming for newer players, or in higher mutations. There are lots of resources to gather, and some of the mini-boss fights are quite challenging, especially Ekheke, the spriggan. DPS should clear the 2 musket enemies while the tank moves Ekheke either on or next to the stairs, to try and reduce his movement. You’ll also meet Isabella a few times. When she has her acolytes with her, make sure you kill them to reduce her power.
Main Damage Type: Void
Neishatun’s arena looks like it’s filled with fire but it actually does Void damage. Another of Aeternum’s snake-like bosses, Neishatun will slither away multiple times, leaving you with an arena full of fiery circles. Zoom your camera right out and look for a gap, because if you get caught in the fire when it pulses, you’ll get a Void DoT that can’t be cleansed until the fight is over. Trash mobs appear during this phase, and you can usually tell where a clear spot will be next by watching where they spawn.
Other moves to look for include a symbol above your head that means Neishatun is going to shoot at you – just move to the side to avoid it. An orb can also appear in the middle of the arena, which you need to destroy before it explodes and gives everyone a Void DoT. For those up close, be careful of the Tail Slam, Tail Swipe, Charge, and Charge Tail Whip, which all do Strike damage.
Main Damage Type: Void
At the end of this expedition, you can finally fight Isabella to the death – yours or hers. The shape of this boss arena is like a triangle, with 3 clearings on the corners. The space in the middle and on the edges is filled with a murky corrupted liquid that we call the spaghetti. Do not stand in the spaghetti, it does a fast DoT and will kill you quickly.
Isabella has really grown into her wings for this fight and uses them as a weapon, as well as to swoop down on players throughout the arena. If you get a symbol above your head, it means she is going to swoop you, so be ready to duck, dive, and roll. She also sends out tendrils of corruption along the ground, that cause a slow and DoT. You can avoid them by moving toward and to the side, but it’s difficult. Corruption Tinctures can help in here. Another attack is a wide slash of corruption that moves quite slowly and can be dodged forward into.
At about 40% health, she will put up a corrupted tower on one of the clearings. If you’re killing her quickly, you can just avoid this by fighting on another clearing. If it’s taking a bit longer, you can destroy the tower by pressing E. Beware of meteors – you can see if one is about to drop by a red circle outline on the ground. If the circle overlaps where you are standing, step out of the way and then resume destroying the tower.
Once Isabella is dead, you need to go to where she lands and use your Azoth Staff to make sure she stays dead. Otherwise, the fight starts over.
Interesting Loot
- M3 – Isabella’s Set – Light armour with Enchanted Ward and Void Harnessing, upgradeable.
- M3 – Befouled weapon set for skins – Acutely Empowered, Gem slot, Refreshing Move, Weapon Ability Perk, Random perk.