The Lazarus Instrumentality
Enemy Type: Ancient
Weaknesses: 30% Lightning 20% Strike 15% Void
Consumables
- Ancient Ward potion – 10% damage absorption
- Ancient Coating – 15% bonus damage
- Ancients Combat Trophy – 3/4/5% bonus damage x3
- Strike damage – War Hammer, Flail
- Topaz gem in weapon for Lightning damage
Faction Missions: Farharbor in Reekwater
Note: *Elemental damage gems in your weapons are simply recommendations based on the elements your enemies are weakest to. Your playstyle may suit non-elemental gems better and you are encouraged to continue using those if so.
Dropped by Chardis.
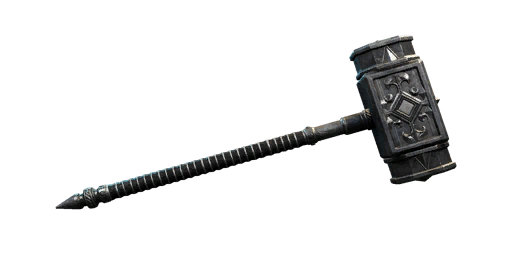
- Mjölnir Blessing: 99% of hammer damage is converted to lightning, and you deal 20% more lightning damage with both weapons.
- Spark: Mighty Gavel causes a lightning strike that inflicts a 30% weaken for 7s.
- [skill charm] Crippling Mighty Gavel II: Mighty Gavel hits inflict 14-16% slow for 7s, and you deal 4.3-5% more damage against slowed targets.
- Shock Attunement II: Successful hits deal +11% weapon damage as Lightning (1.5s cooldown) [Max Stacks: 1]
- Empty Offense Slot
Strategy and tips
Lazarus is a dungeon of puzzles, the first being the Door Room. Mobs spawn in front of a door with three spaces for symbols above it. The first symbol is lit up, and you need to stand on its match from the circle on the floor in the middle of the room. This will open the door and release more enemies, lighting up the next symbol, and so on. When the third symbol is activated, the door closes and another door to the right opens. The symbols are best activated by someone with range, usually the healer. The key is to open them fast enough to keep the fight flowing but not so fast the team gets overwhelmed. It’s good to kill the archers before moving to the next door.
When you get to Cilla, one person should run across to talk to her while the rest fight the enemies. The next fight, Alcyon the mage, can be challenging. The Overhead Staff attack does heavy Strike damage, while all his spells do Void. Look out for him raising his staff above his head and be ready to dodge. The two archers can also be problematic in this fight, so try to clear them early.
Be careful in the handwashing room, as using the fountain will spawn the mini-boss by the door. Make sure everyone is through before you wash your hands. Use the architecture in the room to get out of the ranged attacks line of sight to bring them to you, or just kill the archers quickly.
Main Damage Type: Arcane
Physical Phase: Cilla is a fairly straightforward fight, to begin with. While the tank holds her aggro, the DPS hit her from behind. She has a buff that increases stacks over time, making her hit harder. There are three ports in the floor, where a stone orb can emerge from. Once an orb has risen, you can interact with it to reset the stacks. This will also progress her into the next phase.
If you can withstand the damage through good tanking and healing, the game forces the next phase by reducing damage done to Cilla until the orb is pulled.
Magical Phase: In the magical phase, it is important that the team clump together. Cilla will cast a spell that makes each player leave a pool of Arcane damage at their feet. You have a few seconds to get to a clear area before she makes it explode. She also shoots out orbs that will root you in place if you touch them.
Main Damage Type: Strike and Arcane
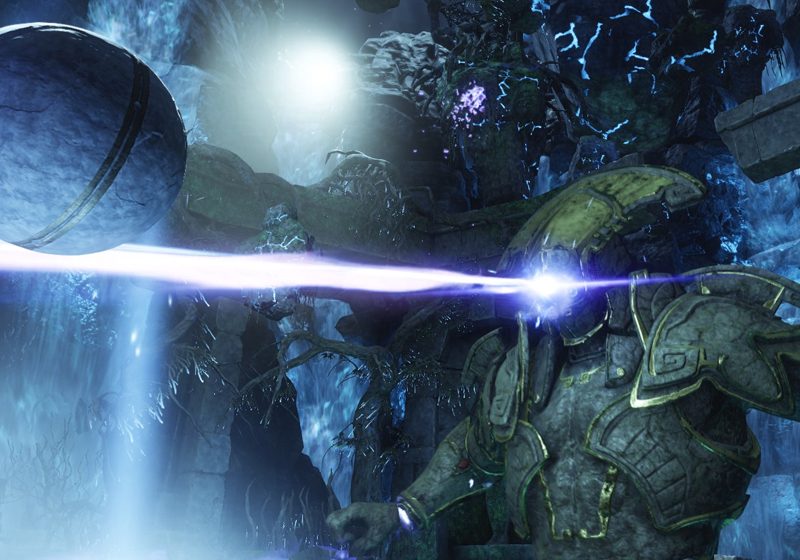
Chardis is about the least mobile boss in the world of Aeternum. He is a giant stone automaton, who uses his detachable hands and a beam from his single eye to attempt to defeat you. When he first awakens, there will be an orb on each side of the room, trapped in a force field. You need to break the field to release the orb, which will spawn a mage over an orb port on the ground. Kill the mage and place the orb.
To fight Chardis, the whole group should stand at the edge of the arena closest to him, in a Sacred Ground. You can block or avoid most of his physical attacks. If you get a symbol over your head, it means you are going to drop a Slicer. Head to the back of the arena to drop it, then return to the fight.
After some time, Chardis will start beaming one player with his eye. This player needs to run to the orb that was placed previously, which will cause both the orb and Chardis to drop to the ground. Once down, players can do increased damage so be sure to use all your Oblivion and Rend to make the most of this advantage.
If there is no orb up, the beam will continue damaging the player it is on. With careful healing, lifesteal, etc, players can continue to fight Chardis while someone is being beamed. But where possible, the orb is always the better option. If an orb is available but not placed, everyone except the healer should work to place that orb.
Interesting Loot
- M3 – Chardis’ Set – Heavy armour with Slash Conditioning and Refreshing, upgradeable.
- M3 – Bone Wrought weapon set for skins – Acutely Empowered, Keenly Fortified/Blessed, Weapon Ability Perk.
- Powerful Magis Mount Charm – +50% dash capacity.