There’s a distinct lack of balls in the mutations this week, but tanks continue their run of good fortune with two more Artifacts that cater toward their specialisation – that big ole dodge-less Tower Shield from Ennead and the sharp spinny sword from the Shipyards.
There are three levels of Mutation, as well as Story mode, for each Expedition.
- M1 requires 650 gear score and is relatively easy, introducing the mechanics of the mutation type at a reduced level of damage.
- M2 is a little harder and requires 675 gear score, with increased scaling and the addition of the Promotion challenges. It is still quite simple to do with an experienced group and is probably the most efficient mode, with improved loot for little effort.
- M3 requires 695+ gear score and optimised perks, gems and buffs. It is considerably more challenging than M2, both with increased scaling and the addition of the mutation Curse as well as the Promotion.
Note: Elemental damage gems in your weapons are simply recommendations based on the elements your enemies are weakest to. Your playstyle may suit non-elemental gems better and you are encouraged to continue using those if so.
Expedition specific
- Sapphire gem Arcane damage
- Corrupted Ward potion
- Corrupted Coating
- Thrust damage – Spear, Rapier, Bow
General buffs
- Honing Stone
- Attribute bonus food
- Topaz gypsum attunement potion
Mutation specific
- Frozen protection amulet
- Aquamarine in armour
- Desert sunrise
Artifact: The Butcher Sword
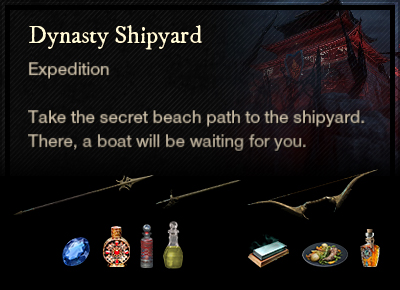
The Dynasty Shipyard we explored on our way to level 60 has become a lot more difficult, and more rewarding. Healers, in particular, can get some very nice looking loot here, and as a mutation it’s all at that higher level.
The two boss fights in Dynasty can be tricky, and it can be good to bring an off-tank to the dog fight in order to keep them separated. Empress Zhou Taiyang is as challenging as ever, so remember to stay away from her pink magic, stack the pylons against the back wall and run back to the door to fight.
Mutation: Icebound
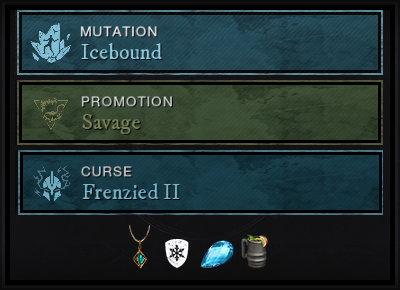
Ice, Ice, Baby! Everything slows down in the cold and this mutation is no exception. We start with Icebound, which means all enemies are dealing Ice Damage, so pull out your Aquamarines and Frozen Protection amulet. Most annoying is Shiver, a zone of exclusion that bites anyone who is outside of it, which keeps the group huddled up together. Be careful of enemies with Glacial, as they will drop a crystal that can root you in place. To prevent this, you need to destroy or run away from the crystal, depending on where it is positioned.
At M1 level, everything is a bit easier, so you will be fine with Opals rather than Aquamarines, and may not need to use Ward potions or Coatings.
M2 - Savage
When you get to M2, Festering enemies start to appear, dealing disease against you so your incoming healing will be reduced. Remember, debuffs can be Purified in a number of ways. Slicer enemies also turn up, adding 30% base Void damage, so think about diversifying your protective gems in this mutation.
M3 - Frenzied
The real trouble starts when things get Frenzied. At M3, players begin being penalised for dodging, by acquiring a stack of Unstable that does 1.5% of max health as Ice damage per second for 10 seconds and cannot be cleansed. You can get up to three of these stacks, and when you do it drops a 3m radius zone that does 10% of max health per second for 15 seconds – ouch, that’s 150% of your health if you just stand there! If you enter this zone with stacks of Unstable, it will consume them and do 30% of max HP. So, it’s really important to manage your stacks and move away from the group if you can’t avoid dropping a puddle. Don’t poop on the group.
Expedition specific
- Topaz gem Lightning damage (Ancient)
- Sapphire gem Arcane damage (Corrupted)
- Ancient and Corrupted Ward potion
- Ancient and Corrupted Coating
- Strike damage – War Hammer (Ancient)
- Thrust damage – Spear, Rapier, Bow (Corrupted)
- Flame protection and Ruby in armour (BS Ancient)
General buffs
- Honing Stone
- Attribute bonus food
- Topaz gypsum attunement potion
Mutation specific
- Void protection amulet
- Amethyst in armour
- Desert sunrise
- Void Absorption potion
Artifact: The Wall Tower Shield
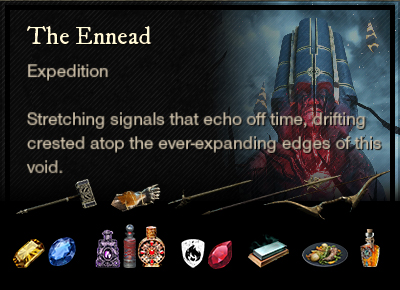
The Ennead has more bosses than any other organisation, with three major boss fights and two bosses in the final battle. This brings us to a total of four big bosses. And don’t forget, you have to defeat the last two twice. This expedition also starts out with Ancient enemies, but with a Brimstone flavour, so if you’re getting toasted, you can consider adding some Fire protection.
The first boss you encounter is Godling Khepri Supernal, a giant scarab beetle. You need to use the architecture of the room to avoid his laser beam, by running around to the other side of the pillar once he starts casting. As long as the group works together, this is a pretty easy fight.
After getting through the twists and turns of the first maze-like section, you will use three Azoth staves to burst a Corruption bubble and encounter a series of Corrupted enemies. This culminates in the second boss fight, with General Crassus. He goes through three phases and summons a lot of adds, so it’s worth having dedicated DPS keeping them under control.
The final boss fight is a doozy. It starts with Anpu, aka Big Guy, who has some nasty elemental attacks, reaching out with ranged spikes and causing an AOE spin, as well as smacking down like a regular brute. The one attack you can control to some degree is his charge, which is usually targeted at the furthest player. If they keep a pillar between Anpu and themselves, he will bonk his head and stop his charge. Make sure you don’t stand in the trail he leaves when he charges, as it does major damage.
Once you knock Anpu over, his little buddy, Heru (aka Small Guy), turns up. He is infinitely more annoying, because he requires the whole team to work together. When he enters his levitation stage in the middle of the arena, four players need to be at each of the floating pillars and use their azoth staves, while suffering massive tick damage. It’s worth drinking a regen pot just before using your staff, to keep the ticks under control. He also stuns and creates damage zones, so be careful.
The real fun starts once Heru goes down, as at this point they both get up and the place becomes chaotic. If you don’t kill them both within 30 seconds of each other, the other one respawns, so one strategy is to get Small Guy down to almost dead, then focus on Big Guy, then when he is almost dead, take them both down. Just careful of Small Guy going into his levitation phase while you’re trying to fight Big Guy, it’s good to have a lot of DPS here to get this fight over and done with.
Mutation: Eternal
It’s all purple in the Ennead this week, with the Eternal mutation transforming the enemies to Void damage, so go with the theme and protect yourself with Amethysts. Paranoia is particularly annoying, with stacks building up as you hit the enemy. When you reach 4 stacks, a purple pool appears at your feet, dealing 40-70% damage. This is easily dodged as an individual, but when the melee are crowded together, you can end up with some big spikes of pain. It might be an opportunity to try a ranged DPS team for a change, with the tank holding aggro and 3 bow users shooting from afar. Creeping enemies Empower their friends when they die and Oblivion enemies use a life leech that heals them when they hit you.
At M1 level, everything is a bit easier, so you will be fine with Opals rather than Amethysts, and may not need to use Ward potions or Coatings.
M2 - Indomitable
When we get to M2, some of the mini-bosses gain Phalanx shields that block projectiles, which is particularly annoying for healers who are trying to speed up their cooldowns or charge up their heals with heavy attacks. If you play ranged DPS, make sure you have a melee weapon in your other slot and be aware that heals might be a bit less powerful. Vampiric also makes an appearance, which can make enemies slower to kill, so your Bile Bomb heartrune might be useful.
M3 - Fiendish
The first of our M3 curses is Weary, which slows down player movement as well as increasing damage taken by 20%. This is on a timer and while you’re meant to be able to delay it by using abilities, it’s been glitchy in game so don’t rely on that.
The other curse is Blood Offering. Using abilities causes a 4.5% Void DoT, which can stack up to 3 times, however while under the influence of Offering players also get a 25% life leech. So as long as you’re doing damage, this curse has little effect. The main person it impacts is the healer, so they may need to focus on healing themselves. Drinking some Desert Sunrise before you start the expedition should help reduce the effect.


