This week's mutation is endlessly Eternal.
Just including this for history’s sake, sorry about the late post.
Contents
Mutation

- Abyssal – 50% of all enemy damage is Void.
- Oblivion – Attacks cause Leech on hit – M1: 20% Void DoT damage for 90% enemy heal, M2 & M3: 30% Void DoT damage for 120% enemy heal.
- Paranoia – Hitting enemies with this title applies stacks of Paranoia. At 4 stacks a Void pool appears at your feet – M1 40% Void damage, M2 & M3: 70% Void damage.
- Creeping – Enemies grant Void Empower to surrounding enemies on death, increasing Void damage by 50%.
Promotion

- Mage Hunter – Enemies drain mana on being hit. M1: 10% drain, M2 & M3: 20% drain.
- Suppressor – Enemies cast a silence zone on attacking players.
Curse

- Combustible – Selects the player with the lowest percent health and surrounds them with a Void aura. When the aura expires, nearby players receive Void damage of 50% max health.
- Shrivelled – All players except the one with the Void aura get a Shrivelled Weaken debuff, reducing damage and healing by 50%. Stepping into the Void aura cleanses the debuff.
Consumables
- Void Protection Amulet
- Amethysts in Armor/Jewelry
- Desert Sunrise
- Void Absorption Potion
- Powerful Honing Stone
- Attribute bonus food
Gearing up
- M1 – Opals in your armor is fine
- M2 – Add the Void Protection Amulet
- M3 – Swap most of your Opals for Amethyst
- Enchanted Ward – Aim for 4 or 5 pieces with this perk.
- For more detailed advice on gear, check out our Gear Guide.
Count your shots
Paranoia enemies will spike you with a Void pool for every 4 times you hit them, so count your shots and then dodge. This is one time that being in the clump can be bad for your health, if you need to stand near others – stay agile!
Kill the creepy ones last
Creeping enemies empower their friends when they die, so if you notice their title, try to keep them for last. This is particularly true if it’s a mini-boss – DPS should kill all the trash mobs while the tank holds the creepy one.
M2 - Healers gonna hate
This promotion is particularly hard on healers due to Mage Hunter. Something to note is that the mana drain only occurs if you hit the Mage Hunter mob, so if there are other targets to use for cooldowns etc, try to hit them instead. Suppressor is annoying for everyone, since the silence stops your abilities from working. At least this one doesn’t blow up.
M3 - Dip and Nae Nae
Desiccated is the easiest to manage of all the curses. If you get the Void aura around you, be sure to dip all your teammates to remove their Shrivelled debuff. Then quickly move (or “Nae Nae”) away, so you don’t spike them with the chain Void.
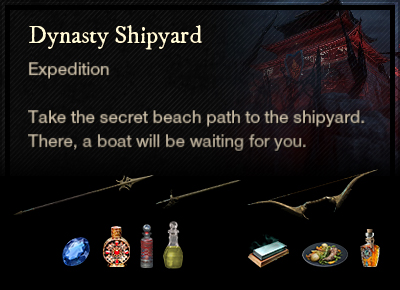
Dynasty Shipyard
Enemy Type: Corrupted
Weaknesses: 30% Arcane 20% Thrust 15% Nature
Consumables
- Corrupted Ward potion – 10% damage absorption
- Corrupted Coating – 15% bonus damage
- Corrupted Combat Trophy – 3/4/5% bonus damage x3
- Thrust damage – Spear, Rapier, Bow, Musket, Blunderbuss
- Sapphire gem in weapon for Arcane damage*
Faction Missions: Fortune’s Crossing in Ebonscale Reach
Note: *Elemental damage gems in your weapons are simply recommendations based on the elements your enemies are weakest to. Your playstyle may suit non-elemental gems better and you are encouraged to continue using those if so.
Artifact: The Butcher
Dropped by Zhou Taiying.
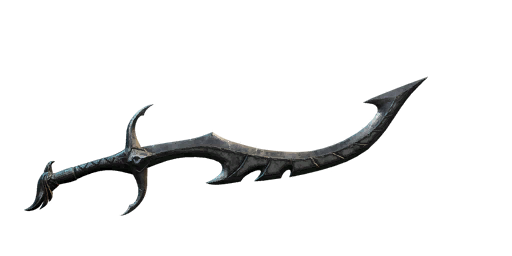
- +38 Magnify (selectable attribute)
- Hemorrhage: Bleeds lasts 33% longer (Works on both weapons).
- Jagged Whirls: Whirling Blade inflicts bleed, dealing 10% weapon damage for 6s.
- Empowering Whirling Blade: If 2 or more enemies are within its radius while performing a Whirling Blade attack, gain 24% base damage for each nearby target (Max 5 Targets).
- Keenly Jagged: Inflicts Bleed on critical hit, dealing 10% weapon damage per second for 6s (7s cooldown).
Strategy and tips
Be careful of the pink elemental Void attacks from maidens and mages, and either block or dodge out. A ranged weapon can be useful in here. Enemy muskets are also quite annoying, so either bring the fight to them or stand out of their line of sight so they come to you.
Main Damage Type: Slash and Void
Isabella begins this fight, leaping around and running away as usual. She has a range of physical damage types, so the tank may be best off with some Onyx and a Slash protection shield, while everyone else needs to just stay out of her reach. She will also spawn three abominations, which are pretty easy to kill.
At about 75% health, Isabella will fly toward the boats and canons will shoot from the distance. The group can huddle up next to the eastern dog cage to prevent the canon fire from landing on them, then go and resume the fight. Canon fire will continue, so make sure you’re not standing in it.
Just before she gets to half health, Isabella gets tired of fighting and opens two of the cages in the room to reveal Oro and Joven, her pet tigers. There are a few strategies for this part of the fight, including allowing the tank to hold one dog while the rest fight the other, or having a DPS play an off-tank for the second dog. This can easily go wrong, however, so you may want to get the group to stand over by the west-side dog and get the tank to grab both of them. That way, AOE attacks will hit both enemies, killing them faster. The dogs do Slash damage and watch out for them jumping back and doing a Void breath attack, catching DP who had been standing safely behind.
Main Damage Type: Void
Empress Zhou’s moves are mostly telegraphed by particle effects, so once you get to know these, you can react in time to avoid them.
- Small particles rising from the floor = Dragon Breath – only hits in front, so just dodge to the side.
- Small particles on the floor radiating out from her = Corruption Wave – dodge into the wave.
- Small particles spinning in a small and wider circle around her = Dragon Circle – if you have grit, you can stand inside, otherwise block.
- Points to a player = Dragon Dive Solo – she will shoot a dragon at you, so move!
- Multiple perpendicular pink lines – Dragon Dive – Dragons will shoot out along those lines and follow players, just step to the side and avoid them.
At about 60% health, the Empress will take a break and summon two waves of trash mobs, plus two pillars. These pillars can also perform her magic spells. Kill the mobs only, then everyone should stack at the East wall of the arena. Zhou will throw 3 more pillars and we want these at this end. Do not kill the pillars. Once all pillars are thrown, everyone should run to the West end to finish the fight.
Interesting Loot
- M3 – Empress Zhou’s Set – Light armour with Health and Refreshing, upgradeable.
- M3 – Harbinger weapon set for skins – split stat Con/Weapon scaling attribute, Enchanted/Purifying Breeze, Weapon Ability Perk.
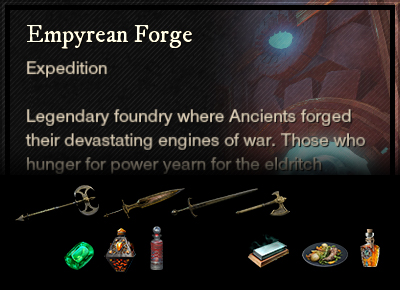
Glacial Tarn
Enemy Type: Ancient and Human
Weaknesses: Ancient: 30% Lightning, 20% Strike, 15% Void. Human: 15% Slash
Note: there are multiple unique weaknesses in this expedition, see below for more details.
Consumables
- Ancient Ward potion | Human Ward potion – 10% damage absorption
- Ancient Coating | Human Coating – 15% bonus damage
- Ancients Combat Trophy | Human Combat Trophy – 3/4/5% bonus damage x3
- Strike damage – Hammer, Void damage – Void Gauntlet | Slash damage – Sword, Greatsword, Hatchet, Great Axe
- Topaz gem in weapon for Lightning damage*
Faction Missions: Warden’s Rise in Great Cleav
Note: *Elemental damage gems in your weapons are simply recommendations based on the elements your enemies are weakest to. Your playstyle may suit non-elemental gems better and you are encouraged to continue using those if so.
Dropped by Snorok Ice Fist.
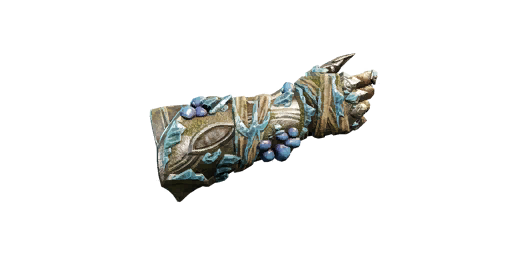
- Chilling End: Frozen, rooted or chilled enemies take 15% additional damage (on both weapons).
- Empty Socket: Attach a gem to add its effect.
- [offense charm] Vicious: +2.4% critical damage.
- Sundering Stacks II: Once every 0.5s, attack inflicts a stack of 3.2% Rend, each stack lasting 6s. (Max 5 stacks)
- Empty Offense Slot
Strategy and tips
Partner to the Empyrean Forge, Glacial Tarn is the icy portion of the underground Great Cleave. You will see fire pits along your journey, which provide you with a buff that melts through ice-forged enemies. As long as one person with the buff has attacked the enemy, everyone will be able to do normal damage. If no one has the buff, your attacks become weak and the enemies take a long time to die. Sometimes the group needs to decide whether to go back for a buff or whether to run forward to the next one.
The puzzle rooms in the second half of the expedition require some coordination. Each door requires someone on the previous plate in order to unlock it. There are ice-forged enemies here and a sheet of ice that cleanses the fire buff, so again you’ll have to choose whether to fight or run. If you do run and jump down, make sure you step out of the archer’s line of sight.
Not only does Glacial Tarn have two enemy types, a number of the mobs have different weaknesses than normal Ancients and Humans do.
- 30% Fire, 30% Lightning, 15% Strike – Ancient Sanctifier, Ancient Elemental Archer
- 30% Nature, 15% Ice, 10% Strike – Protector of the Ancient Spring
Main Damage Type: Ice/Strike
Snorok is categorised as an Ancient Guardian but has his own specific weaknesses – 20% Lightning, 15% Thrust, 15% Fire.
This Ice Troll throws plenty of temper tantrums, smashing the ground and bringing down stalactites on unsuspecting heads. Ranged weapons can be useful here, due to the slow and hypothermia effects from his large blizzard spell, although if you can stand the cold, melee will kill him more quickly. DPS should probably use a Frozen protection amulet in here, while the tank would be best off with Strike protection. While all his moves are predictable, it’s still easy to just miss one mechanic and get wiped out with one hit, so play carefully.
- Frost Breath – Snorok will emit a cone of icy breath about half the arena’s length. Be aware that this will follow you as you move out of it, so you might need an extra dodge.
- Charge – If a blue symbol appears above your head, get ready to move. Snorok will make a quick charge across the room and being hit generally results in death. He’ll usually do two in a row, not always to the same person.
- Personal Pound – Stalactites will drop in the melee vicinity of the boss, doing strike damage.
- Stalactite Storm – Snorok will rage and stalactites will drop everywhere in the arena. You have some warning of the drop zone by a circle appearing on the ground just prior to the drop. These do high amounts of ice damage, so do your best to avoid being hit.
- Blizzard – Snorok summons a large aura of cold, that almost fills the arena. If you are playing ranged, look for the edge of the storm and stand outside it.
Main Damage Type: Slash/Ice
This is an interesting boss fight, because it includes multiple enemies. Our task is to defeat Ser Loth, but he is supported by the giant Ice Entity in the centre of the area and the four Spellcasters who bring it to life. Ser Loth does mostly slash damage with his giant sword, while the Ice Entity does Strike and Ice. The arena consists of four island platforms joined by bridges, that form a ring around the giant Ice Entity. It is possible to fall off, so watch your footing.
The four spellcasters spawn periodically, initially with a protective aura. When this aura drops, they can be attacked, and killing all four mages puts the Ice Entity to sleep temporarily. When this expedition was first released, there were many bugs, and if you killed the mages at the wrong time it could prevent the fight from being completed. So, many groups simply ignore the mages and dodge the Entity attacks.
- Ice Javelin – a blue symbol will appear above the head of the player Ser Loth is throwing the ice javelin toward, warning you to dodge. Anyone else in the line of fire will be hit.
- Ice Wave – same as the Ice Javelin but a wider wave.
- Frost Breath – The Ice Entity will breathe on an island, making it slippery and spikey and causing damage – you need to get off the island!
- Ice Bomb – The Ice Entity will throw a bomb onto one island – you need to destroy it before it explodes.
- Break Bridges – a red symbol will appear above all bridges just before the Ice Entity breaks them. If you are on a bridge, you will fall and be out of the fight. After a period of time, bridges can be rebuilt by interacting at the edge of the island.
- Weak Spots – three greenish discs will appear on the Ice Entity. While these are up, Ser Loth will resist most of your damage. Ranged attacks need to destroy the weak spots.
Interesting Loot
- M3 – Verglas weapon set for skins – Acutely Empowered, Gem slot, Vicious/Blessed, Weapon Ability Perk/Mortal Fortification, Random perk.
- Frigid Dawn Set – Heavy armour with Elemental Aversion and Enchanted Ward (illegal combo), upgradeable.
- Powerful Empowered Talisman – mount charm – Provides the Empowered status effect when force dismounted through combat.
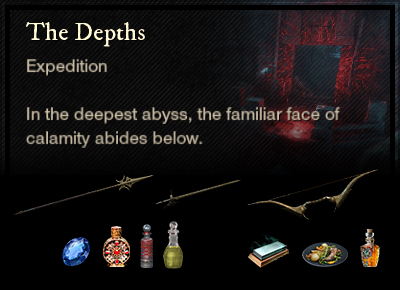
The Depths
Enemy Type: Corrupted
Weaknesses: 30% Arcane 20% Thrust 15% Nature
Consumables
- Corrupted Ward potion – 10% damage absorption
- Corrupted Coating – 15% bonus damage
- Corrupted Combat Trophy – 3/4/5% bonus damage x3
- Thrust damage – Spear, Rapier, Bow, Musket, Blunderbuss
- Sapphire gem in weapon for Arcane damage*
Faction Missions: Moonbay in Restless Shore
Note: *Elemental damage gems in your weapons are simply recommendations based on the elements your enemies are weakest to. Your playstyle may suit non-elemental gems better and you are encouraged to continue using those if so.
Artifact: Lost Stopwatch Amulet
Dropped by Commander Thorpe.

- +32 Magnify (selectable attribute)
- Stunny Gaze: Taunts are active. Generate 300% more threat. Stuns last 1s longer, but base damage is decreased by 10%.
- Empty Socket: Attach a gem to add its effect.
- Purify: When you are hit while below 50% Health, you lose all debuffs (90s cooldown. Does not trigger off persistent damage, DoT effects, or blocked attacks).
- Health: Increase max health by 7% of the base value.
Strategy and tips
There are lots of teleports, trigger platforms and azoth staff nodes in this expedition, as well as a plethora of ranged enemies. Use the twists and turns to your advantage by getting out of their line of sight and forcing them to come to you.
Main Damage Type: Void
The Archdeacon begins the fight in the centre of his arena, although he can move around if players do. He summons Corrupted dogs and has a nasty Ground Wave spell that you’ll need to dodge. Try to keep the dogs in the clump so they get killed by the hits on the Archdeacon.
When he gets to about 50% life, he’ll become invincible and channel a red beam to the east side of the arena. While the Archdeacon is invincible, mines will periodically spawn and if they are not destroyed they will explode and apply Void damage to everyone in the room. If you learn the timing, you can dodge this explosion. Two DPS should step on the teleport pad, which will take them up to a platform where two mages spawn. After killing the mages, one DPS needs to use their Azoth Staff on the node so they can both return to the main arena. Azamela will resume his normal state.
At about 20% health, the Archdeacon starts channelling again, this time with an additional green beam to the west side. You need to split the group and clear each platform as soon as you can. If the dogs are clear, the healer can remain on the ground and heal each side, but usually they will go up with the tank and DPS on the green side. Surviving the bomb damage at this point is the hardest part, clear quickly, dodge if you can, and use potions carefully to stay alive.
Main Damage Type: Fire
Thorpe has been with us since the first sea voyage to Aeternum, so we should be familiar with his moves by now. His great sword does a large amount of Fire damage as well as Slash. Even when behind him, some of his moves swing back, so DPS need to be careful. When he charges, stay out of the firey trail.
Thorpe is pretty chatty and you can use his voice lines to tell what is going to happen next.
- “Ha! Pathetic!” = he goes off the tank and attacks one of the other group members
- “This will be the last time we meet” = he rises and becomes invincible while he casts a beam that spawns two behemoths. Don’t get hit by the beam and kill the adds while the tank holds Thorpe away.
- “Prepare to have your soul crushed” = aka The Big Sticky Finger. Thorpe points a beam across the room and slowly rotates. It’s pretty slow so easy enough to stay away from or you can duck under it.
- “Time to taste Corrupted Steel” = slams down his sword – don’t be too close.
- “I will crush you beneath my heel, ant!” = he summons a beam of fire and directs it at one player, leaving a circle of fire on the floor.
Interesting Loot
- M3 – Expedition Captain’s Set – Heavy armour with Strike Conditioning and Grit Ward, upgradeable.
- M3 – Gleaming Pitch weapon set for skins – split stat Con/Weapon scaling attribute, Keenly Empowered/Blessed, Weapon Ability Perk.