The Ennead
Enemy Type: Ancient and Corrupted
Weaknesses: Ancient: 30% Lightning 20% Strike 15% Void. Corrupted: 30% Arcane 20% Thrust 15% Nature
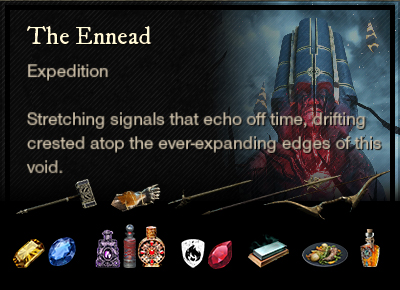
Consumables
- Ancient Ward potion | Corrupted Ward potion – 10% damage absorption
- Ancient Coating | Corrupted Coating – 15% bonus damage
- Ancients Combat Trophy | Corrupted Combat Trophy – 3/4/5% bonus damage x3
- Strike damage – Hammer, Void damage – Void Gauntlet | Thrust damage – Spear, Rapier, Bow, Musket, Blunderbuss
- Topaz gem in weapon for Lightning damage* | Sapphire gem Arcane damage*
Faction Missions: New Corsica Town, Wikala Al-Wahaha, and Taberna Mercatus in Brimstone Sands
Note: *Elemental damage gems in your weapons are simply recommendations based on the elements your enemies are weakest to. Your playstyle may suit non-elemental gems better and you are encouraged to continue using those if so.
Dropped by Heru.
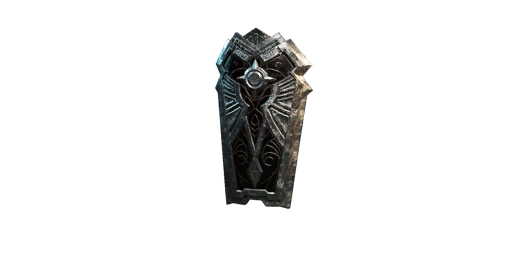
- Shield Wall: Shield Wall: Gain 5% base damage reduction You cannot dodge and stamina regen rate is reduced by 10%, but have 33% more stamina. (While active or sheathed)
- Chromatic Ward: You take 13% less damage from all elemental sources, and have +10% elemental armor.
- Sturdy II: Receive 7.9-10% less Stamina damage while blocking. [Max Stacks: Unlimited]
- Keenly Fortified II: Gain 15% Fortify for 5s on critical hit (7s cooldown). [Max Stacks: 1]
- Empty Defense Slot
Strategy and tips
The Ennead is a bit of a maze and there are many different ways you can go and still reach your final destination. The fastest way is to take the first left in the passageway after the first room, kill all the beetles, then hug the wall on the right, fight the two sphinx and then proceed up to the mini-boss guarding the door. This does skip a lot of mini-bosses though, so if you’re wanting to complete faction missions or collect Azoth Crystal items from M2+ then you’ll have to go the long way.
Beware the Horus Guardians, as they teleport backwards away from the fight. Try to position them so they have a wall behind them and cannot get too far away. Some of the mini-bosses have attacks that do high damage, including Shai in the first room. If you are dying to this, consider taking your Con up to 100. On top of the mutation elemental damage, many of the attacks here are Fire or Void, so if you need somewhere to put your resistance over the 50% cap, these are good choices.
After the first boss, the enemies become Corrupted instead of Ancient. In M2 and M3, you may consider rebuffing at this point or even changing weapons. After the second boss, we return to Ancient for the final section.
Main Damage Type: Fire
This giant beetle is the first boss you will face. When you first enter the arena, there is a chance Khepri will charge, so be ready for it. As well as the physical attacks, Khepri emits a Solar Blast that does Fire damage. Watch out when the beetle launches into the air, because it is going to land with a slam. This gives you plenty of time to prepare a dodge. In the early part of the fight, it will do one slam but as the fight progresses, it will do two and then three, which is harder to dodge successfully.
Periodically, a solar beam will be targeted at each player. In most cases, you should be able to just fight through this, with good heals. For M3, you may want to use one of the pillars in the room to hide behind, which will stop the beam from damaging you.
Main Damage Type: Void
The General is Corrupted, so most of the elemental attacks in this fight are Void, including the corrosion blobs on the floor. There are a couple of Fire attacks, from the Archer phase, so try to stay out of those. General Crassus takes three different forms in this fight, each with their own signature moves.
Legionnaire Phase
This is the opening form, where General Crassus uses a spear. He begins flanked by two Signifiers and some trash mobs. It’s always good to clear Signifiers first, as they have a large area of effect Rend debuff. Watch out for the Phantoms – a row of ghostly soldiers that can hit hard. If this phase takes too long, additional enemies will spawn from a plate at each end of the arena. This is too far for the tank to taunt both of them, so DPS will need to manage these mobs and kill them or bring them to the clump.
Sagittarii Phase
At about 70% health, Crassus will return to the centre of the arena and his weapon will transform into a bow. He’ll also summon 4 allies around him. The bow attacks do fire damage, so make sure you keep moving around. Adds will continue to spawn on the plates and need to be kept under control or the healer won’t be able to heal.
Signifier Phase
In the final phase, at about 40% health, Crassus transforms into a Signifier with a staff. Two cyclops are spawned at the same time. Rather than fight these, DPS should move on to the boss and allow the tank to kite the Cyclops around the arena. It’s important to kill Crassus as fast as you can to finish the fight.
Main Damage Type: Fire
So, you’ve probably already noticed that Ennead has an extra boss fight, and to top that off, the final battle is with not one but two bosses. First we fight Anpu and then Heru, but when Heru dies the first time, they both rise up and we have to fight them together. The final deaths need to be within 10 seconds of one another, or else they will both respawn. So when one gets down to 1-2 bars of health, change your target to the other one.
Anpu
The big guy is Anpu and he spawns at the back left corner of the arena. On entering, the whole team should run up and fight fairly close to the pillar he spawns near. The tank should keep him on the far side of the pillar, and the furthest player needs to keep the pillar between them and Anpu, so that when he charges the pillar blocks him.
- Fire circle – when Anpu lifts his leg, he will spin fire around himself. Step back until this is over.
- Fire charge – Anpu will charge at the furthest player. Use a pillar to block him. He will leave a trail of fire which causes a fire DoT, so it’s best to reduce this by making him hit the closest pillar rather than charging across the arena.
- Cleave – Anpu will slam the ground and cause a line of seismic damage to head toward a player.
- Bolt – Apnu will throw two fast projectiles at a ranged player. These can be dodged if you’re quick.
Heru
Once Anpu is killed the first time, Heru will spawn near the glyph at the back of the arena. At this point, players need to be prepared to move toward the four pillars in the arena, so a ranged weapon can be useful.
- Judgement of the Gods – you will get a beam on you that causes a stun – make sure you’re not standing in fire when it takes effect.
- Divine Doom – a beam of light targets each player, causing fire damage. Just move out of it.
- Sun Beam – circles of fire move around the arena, be careful not to stand in them.
- Pillars – Heru will teleport to the middle of the room and hover in the air. Each pillar will start glowing and need to be disabled via interacting with it. While there are any pillars that haven’t been disabled, a wave of damage will periodically sweep the room. There is enough time to disable a pillar before the wave, if you start as soon as its available, otherwise you will need to dodge the wave or heal through it. Group coordination is key here and it’s best to assign pillars before the fight begins.
Interesting Loot
- M3 – Sun Lord’s Set – Light armour with Grit Ward and Refreshing, upgradeable.
- M3 – The Pharaoh’s weapon set for skins – Acutely Empowered, Gem Slot, Keen/Desperate Prayer, Weapon Ability Perk, Random Perk.
- Powerful Solum Mount Charm – +14% dash speed when off-road