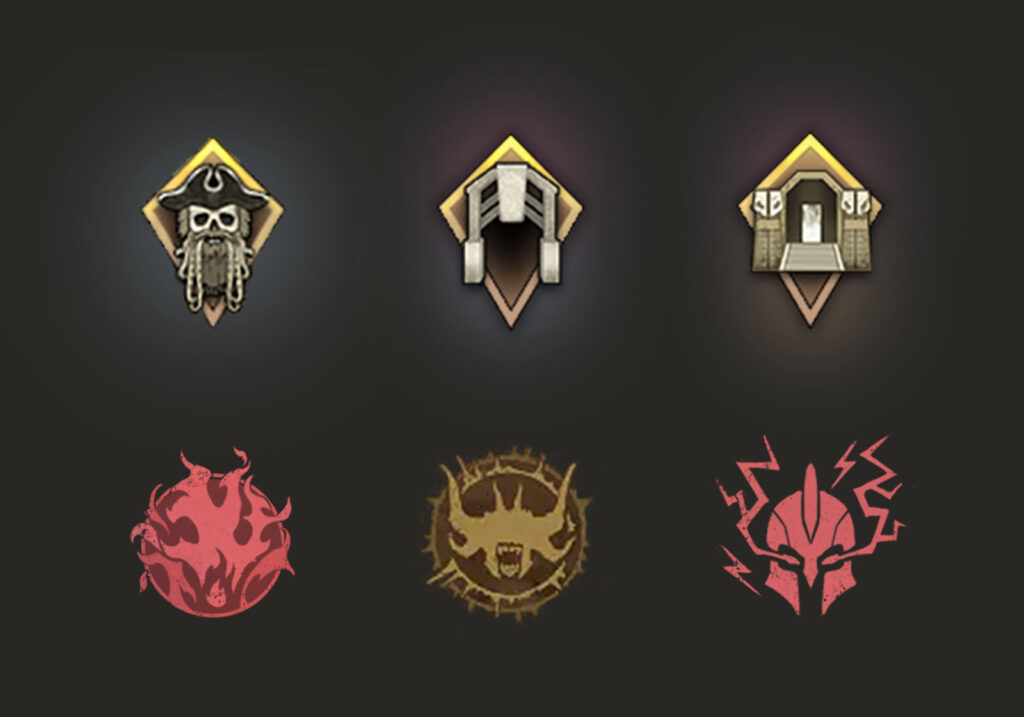
This week's mutation is hazardous Hellfire
Just keeping a record of the weekly rotation until the change to daily is properly implemented. For more general mutation information, check out our Mutations Guide.
Contents
Mutation

- Ignited – 50% of all enemy damage is Fire.
- Fiery – Burn is applied on hit – M1: 4% Fire damage over time, M2 & M3: 8% Fire damage over time.
- Enflamed – Enemies with this title cast a Burn zone that deals Fire damage over time. M1: 20%, M2 & M3: 40%.
- Explosive – Enemies with this title explode on death, dealing 70% Fire damage.
Promotion

- Vampiric – Enemies heal a percentage of damage done. M1: 20%, M2 & M3: 40%.
- Phalanx – Enemies cast a shield that blocks ranged attacks.
Curse

- Unstable – After dodging, players receive a stack of Fire damage over time dealing 1.5% max health every second for 10 seconds.
- Overcharged – If Unstable expires with 3 active stacks, it drops a 3m zone that lasts 15 seconds and applies 10% max health Fire damage per second. Entering the zone will consume all stacks of Unstable and deal 30% max HP damage.
Consumables
- Flame Protection Amulet
- Rubies in Armor/Jewelry
- Desert Sunrise
- Fire Absorption Potion
- Honing Stone
- Attribute bonus food
Gearing up
- M1 – Opals in your armor is fine
- M2 – Add the Flame Protection Amulet
- M3 – Swap most of your Opals for Rubies
- Enchanted Ward – Aim for 4 or 5 pieces with this perk
- For more detailed advice on gear, check out our Gear Guide.
Dodge Explosions
Explosive enemies go boom! Not only does this do a big chunk of damage but it also throws you around, even off the edge of the dungeon, if you’re close. Look for the title and be ready to dodge or get out of the way.
The floor is lava
The Burn zone from Enflamed enemies can get pretty hot, so make sure you’re stacking on, and staying in, the heals. Leaving and returning to this space may cause an (unintended?) double stack of burn, so either stay with the clump or stay out of the fire.
M2 - Melee and chunder
There’s a penalty for using ranged attacks once again, with Phalanx enemies putting up a deflecting shield, so make sure you have at least one melee weapon. Vampiric slows down the time to kill on mobs that have it, so slotting your Bile Bomb Heartrune can help.
M3 - Don't Poop on the Group
While fully geared and optimised groups can power through multiple Overcharged pools of pain, civilised dodgers might prefer to drop their load in a corner away from others. The other option is to use your dodges carefully and never allow the full three stacks to build up.
Barnacles and Black Powder
Enemy Type: Lost
Weaknesses: 30% Nature 15% Ice 10% Strike

Consumables
- Lost Ward potion (Angry Earth Ward for Nereid) – 10% damage absorption
- Lost Coating (Angry Earth for Nereid) – 15% bonus damage
- Lost Combat Trophy (Angry Earth for Nereid) – 3/4/5% bonus damage x3
- Nature/Strike/Ice damage – Life Staff, War Hammer, Flail, Ice Gauntlet
- Amber gem in weapon for Nature damage*
Faction Missions: Spyglass Ridge in Cutlass Keys
Note: *Elemental damage gems in your weapons are simply recommendations based on the elements your enemies are weakest to. Your playstyle may suit non-elemental gems better and you are encouraged to continue using those if so.
Dropped by Nereid.

- Dark Reinforced: Your armor is increased by 20%. However, its equip weight is increased by 10%, and you take 8% increase block damage.
- Empty Socket: Attach a gem to add its effect.
- [defense charm] Enchanted Ward II: 1.6-2% reduced damage taken from light and heavy attacks. [Max Stacks: 5]
- [defense charm] Physical Aversion: Receive 2.8-3.6% less damage from ranged, physical attacks. [Max Stacks: 5]
- Empty Defense Slot
Strategy and tips
This is a very pirate-y expedition, with lots of explosions and gunshots. Watch out for bombers – you can root them and run, or if you’re clever you can lead them to their friends and use them as a weapon. To beat the mutation timer, players generally tend to skip past mobs and group them up. Be aware of ghosts and try to kill them rather than skipping, since they cast spells that slow you down.
Main Damage Type: Fire
The Admiral is a huge pirate with interesting feet and some really big balls. The fight seems deceptively simple at first, with everyone beating on him. He throws explosives, and if you see a red circle on the floor, you’re going to take some fire damage.
At about 75% health, he jumps up onto the ship at the back of the arena so you can’t hit him. He’ll usually spawn a group of minions at the same time. The Admiral throws down kegs and cannon balls, and lines of fire appear on the floor. The kegs drop a radius of black powder which causes a Fire DoT. You can pick up the cannon balls, load them into the two cannons at the side of the arena and use them to shoot Admiral Blackpower. After three shots, he will come back to the fight.
This happens again at 50% life and about 25%, with more fire lines each time, which you can just dodge through. At the end of the fight, after you pick up your bag, Admiral Blackpowder has one last explosive surprise.
Main Damage Type: Nature
Nereid is an interesting boss. First of all, she is Angry Earth, not Lost, so you’ll want to change your wards and coatings. She also has different Weaknesses to either regular Angry Earth or Lost – 30% Ice, 20% Strike.
Her attacks do a range of physical damage types, and she uses a Lightning spear, but the most troublesome part of this fight is the wind, which does Nature damage and pushes you around. So we recommend using some Nature protection to help out if you get stuck, and just avoiding the rest.
Nereid will fight in the centre of the arena and periodically spin along the cross pattern on the floor. It’s usually safest to stand on a diagonal, but be ready to move if she comes your way. There is a predictable pattern to her movement that you can learn. When Nereid moves to the centre of the arena and raises her staff, stand back and make sure you are on the diagonal. Gusts of wind will shoot out along the lines of the cross.
It’s possible to play this fight as ranged, from the edge of the room, as long as you keep an eye out for the tornados that circle the arena. Toward the end, there is a lot of wind and lightning (it’s very very frightening), so be careful of your positioning.
Interesting Loot
- M3 – Siren’s Set – Medium armour with Health and Elemental Aversion, upgradeable.
- M3 – Admiral’s Set – Light armour with Ice Harnessing and Elemental Aversion, upgradeable.
- M3 – Pirated weapon set for skins – Acutely Empowered, Gem slot, Rogue/Keen Speed/Desperate Prayer, Weapon Ability Perk.
- Powerful Hasty Talisman – mount charm – Provides the Haste status effect when force dismounted through combat.
Starstone Barrows
Enemy Type: Ancient and Lost
Weaknesses: Ancient: 30% Lightning 20% Strike 15% Void. Lost: 30% Nature 15% Ice 10% Strike
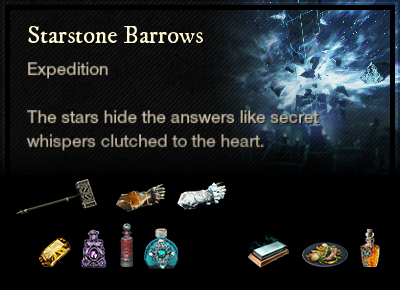
Consumables
- Ancient Ward potion | Lost Ward potion – 10% damage absorption
- Ancient Coating | Lost Coating – 15% bonus damage
- Ancients Combat Trophy | Lost Combat Trophy – 3/4/5% bonus damage x3
- Strike damage – Hammer, Void damage – Void Gauntlet | Nature/Strike/Ice damage – Life Staff, War Hammer, Flail, Ice Gauntlet
- Topaz gem in weapon for Lightning damage* | Amber gem Nature damage*
Faction Missions: Oxboro or faction base in Everfall
Note: *Elemental damage gems in your weapons are simply recommendations based on the elements your enemies are weakest to. Your playstyle may suit non-elemental gems better and you are encouraged to continue using those if so.
Artifact: Blooddrinker Ring
Dropped by Greundgul the Regent.
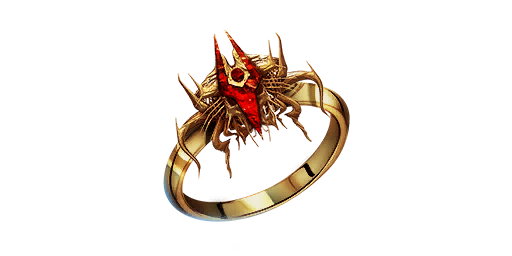
- Ghoul’s Harmony: +25% lifesteal and all healing from lifesteal is increased by 5%. However, you deal -20% base damage, unless the target is diseased, then damage is only reduced by 15%.
- Empty Socket: Attach a gem to add its effect.
- [offense charm] Leeching II: Heal for 3.2-4% of the damage you deal (Does not trigger off persistent damage or DoT effects). [Max Stacks: 5]
- Keen Switch II: On weapon swap, increase crit chance by 7.1-9% for 3s or until the next hit (3s cooldown) [Max Stacks: 1]
- Empty Offense Slot
Strategy and tips
While it has the same name, this is not the Starstone Barrows you entered on your journey growing up in Aeternum so many levels ago. There is a break in the walls of the dungeon and you’ll find yourself in Amrine, fighting Lost, for a period of time. This is a fun dungeon full of nostalgia, twists and tricks. Be careful of the purple beams as they will kill you outright should you wander into one.
When you emerge from the Lost tunnels and return to fighting Ancients, the first reliquary can be used to let the group through both sets of beams to continue fighting, while the torchbearer goes up the stairs to turn the power off. This saves everyone from standing around just waiting.
Remember to carry extra consumables so you can swap wards and coatings in higher level mutations, it can mean the difference between life and death.
Main Damage Type: Strike
Simon Grey has grown up too and is level 70 in mutated expeditions. His attacks are scaled up accordingly and his Overhead Slam can outright kill a low con, under-geared DPS. Apart from that, this is a fairly straightforward fight.
- Overhead Slam: Simon raises both hands over his head and slams down, causing AoE Strike damage. Look for the movement and be ready to dodge.
- Minions: Simon will spawn 3 lost enemies. If you don’t kill them in time, he will suck them in for a life leech.
- Vomit: Simon’s vomit is pretty toxic and will cause a slow as well as reduce incoming healing.
Main Damage Type: Slash
Greundgul is an Ancient construct with a very large sword. Be careful of the backswing when fighting behind her. She’s quite mobile and will push the group around the arena. Make sure you have someone with a ranged attack to stop her when she gets to the jumping phase.
- Throw Bone: Greundgul throws a bone at the furthest player, that spawns skeletal minions. These are only a mild annoyance unless the fight takes long enough to create too many of them. This can be minimised by the group clumping close to the boss, so the bone and adds get destroyed by everyone’s attacks.
- Jumping Phase: After the first time Greundgul’s health reaches almost zero, she will reassemble herself in the centre of the arena and then leap at a random player, sending out a shockwave of damage with each jump. To control where she jumps, the group should all stack on one player. If you can hit her in the eye as she lands, she’ll stop jumping. The jumping phase repeats periodically until she finally dies.
Interesting Loot
- M3 – Simon Grey’s Set – Medium armour with Arcane Harnessing and Health, upgradeable.
- M3 – Stormbound weapon set for skins – Acutely Empowered, Gem slot, Keenly Jagged/Blessed, Weapon Ability Perk.
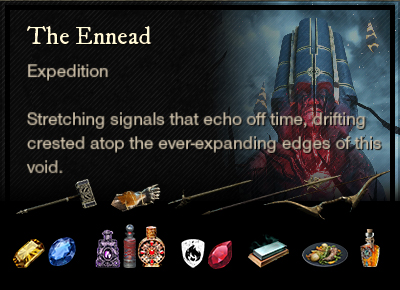
The Ennead
Enemy Type: Ancient and Corrupted
Weaknesses: Ancient: 30% Lightning 20% Strike 15% Void. Corrupted: 30% Arcane 20% Thrust 15% Nature
Consumables
- Ancient Ward potion | Corrupted Ward potion – 10% damage absorption
- Ancient Coating | Corrupted Coating – 15% bonus damage
- Ancients Combat Trophy | Corrupted Combat Trophy – 3/4/5% bonus damage x3
- Strike damage – Hammer, Void damage – Void Gauntlet | Thrust damage – Spear, Rapier, Bow, Musket, Blunderbuss
- Topaz gem in weapon for Lightning damage* | Sapphire gem Arcane damage*
Faction Missions: New Corsica Town, Wikala Al-Wahaha, and Taberna Mercatus in Brimstone Sands
Note: *Elemental damage gems in your weapons are simply recommendations based on the elements your enemies are weakest to. Your playstyle may suit non-elemental gems better and you are encouraged to continue using those if so.
Dropped by Heru.
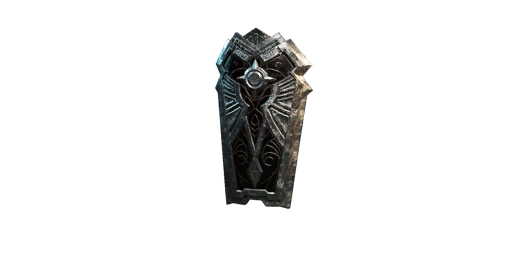
- Shield Wall: Shield Wall: Gain 5% base damage reduction You cannot dodge and stamina regen rate is reduced by 10%, but have 33% more stamina. (While active or sheathed)
- Chromatic Ward: You take 13% less damage from all elemental sources, and have +10% elemental armor.
- Sturdy II: Receive 7.9-10% less Stamina damage while blocking. [Max Stacks: Unlimited]
- Keenly Fortified II: Gain 15% Fortify for 5s on critical hit (7s cooldown). [Max Stacks: 1]
- Empty Defense Slot
Strategy and tips
The Ennead is a bit of a maze and there are many different ways you can go and still reach your final destination. The fastest way is to take the first left in the passageway after the first room, kill all the beetles, then hug the wall on the right, fight the two sphinx and then proceed up to the mini-boss guarding the door. This does skip a lot of mini-bosses though, so if you’re wanting to complete faction missions or collect Azoth Crystal items from M2+ then you’ll have to go the long way.
Beware the Horus Guardians, as they teleport backwards away from the fight. Try to position them so they have a wall behind them and cannot get too far away. Some of the mini-bosses have attacks that do high damage, including Shai in the first room. If you are dying to this, consider taking your Con up to 100. On top of the mutation elemental damage, many of the attacks here are Fire or Void, so if you need somewhere to put your resistance over the 50% cap, these are good choices.
After the first boss, the enemies become Corrupted instead of Ancient. In M2 and M3, you may consider rebuffing at this point or even changing weapons. After the second boss, we return to Ancient for the final section.
Main Damage Type: Fire
This giant beetle is the first boss you will face. When you first enter the arena, there is a chance Khepri will charge, so be ready for it. As well as the physical attacks, Khepri emits a Solar Blast that does Fire damage. Watch out when the beetle launches into the air, because it is going to land with a slam. This gives you plenty of time to prepare a dodge. In the early part of the fight, it will do one slam but as the fight progresses, it will do two and then three, which is harder to dodge successfully.
Periodically, a solar beam will be targeted at each player. In most cases, you should be able to just fight through this, with good heals. For M3, you may want to use one of the pillars in the room to hide behind, which will stop the beam from damaging you.
Main Damage Type: Void
The General is Corrupted, so most of the elemental attacks in this fight are Void, including the corrosion blobs on the floor. There are a couple of Fire attacks, from the Archer phase, so try to stay out of those. General Crassus takes three different forms in this fight, each with their own signature moves.
Legionnaire Phase
This is the opening form, where General Crassus uses a spear. He begins flanked by two Signifiers and some trash mobs. It’s always good to clear Signifiers first, as they have a large area of effect Rend debuff. Watch out for the Phantoms – a row of ghostly soldiers that can hit hard. If this phase takes too long, additional enemies will spawn from a plate at each end of the arena. This is too far for the tank to taunt both of them, so DPS will need to manage these mobs and kill them or bring them to the clump.
Sagittarii Phase
At about 70% health, Crassus will return to the centre of the arena and his weapon will transform into a bow. He’ll also summon 4 allies around him. The bow attacks do fire damage, so make sure you keep moving around. Adds will continue to spawn on the plates and need to be kept under control or the healer won’t be able to heal.
Signifier Phase
In the final phase, at about 40% health, Crassus transforms into a Signifier with a staff. Two cyclops are spawned at the same time. Rather than fight these, DPS should move on to the boss and allow the tank to kite the Cyclops around the arena. It’s important to kill Crassus as fast as you can to finish the fight.
Main Damage Type: Fire
So, you’ve probably already noticed that Ennead has an extra boss fight, and to top that off, the final battle is with not one but two bosses. First we fight Anpu and then Heru, but when Heru dies the first time, they both rise up and we have to fight them together. The final deaths need to be within 10 seconds of one another, or else they will both respawn. So when one gets down to 1-2 bars of health, change your target to the other one.
Anpu
The big guy is Anpu and he spawns at the back left corner of the arena. On entering, the whole team should run up and fight fairly close to the pillar he spawns near. The tank should keep him on the far side of the pillar, and the furthest player needs to keep the pillar between them and Anpu, so that when he charges the pillar blocks him.
- Fire circle – when Anpu lifts his leg, he will spin fire around himself. Step back until this is over.
- Fire charge – Anpu will charge at the furthest player. Use a pillar to block him. He will leave a trail of fire which causes a fire DoT, so it’s best to reduce this by making him hit the closest pillar rather than charging across the arena.
- Cleave – Anpu will slam the ground and cause a line of seismic damage to head toward a player.
- Bolt – Apnu will throw two fast projectiles at a ranged player. These can be dodged if you’re quick.
Heru
Once Anpu is killed the first time, Heru will spawn near the glyph at the back of the arena. At this point, players need to be prepared to move toward the four pillars in the arena, so a ranged weapon can be useful.
- Judgement of the Gods – you will get a beam on you that causes a stun – make sure you’re not standing in fire when it takes effect.
- Divine Doom – a beam of light targets each player, causing fire damage. Just move out of it.
- Sun Beam – circles of fire move around the arena, be careful not to stand in them.
- Pillars – Heru will teleport to the middle of the room and hover in the air. Each pillar will start glowing and need to be disabled via interacting with it. While there are any pillars that haven’t been disabled, a wave of damage will periodically sweep the room. There is enough time to disable a pillar before the wave, if you start as soon as its available, otherwise you will need to dodge the wave or heal through it. Group coordination is key here and it’s best to assign pillars before the fight begins.
Interesting Loot
- M3 – Sun Lord’s Set – Light armour with Grit Ward and Refreshing, upgradeable.
- M3 – The Pharaoh’s weapon set for skins – Acutely Empowered, Gem Slot, Keen/Desperate Prayer, Weapon Ability Perk, Random Perk.
- Powerful Solum Mount Charm – +14% dash speed when off-road